My Dream Scope
Celestron CGE
1400 FS
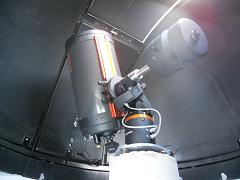
The CGE Mount
The Celestron German Equatorial (CGE) Mount is an Observatory-class
computerized mount and can have a payload weight of 65 pounds. Once
the scope is aligned, it is very good at slewing to a desired target
and tracking. The Allstar Polar alignment feature is worth its weight
in gold. Polar aligning takes only minutes once the scope is accurately
aligned. See the Tutorial section on the process involved in Polar
Aligning. Aside from the slewing problems I encountered when I first
purchased the scope (See Blog Feb. 2011), this mount has been stable
and problem free ever since.
Feathertouch
MicroFocuser
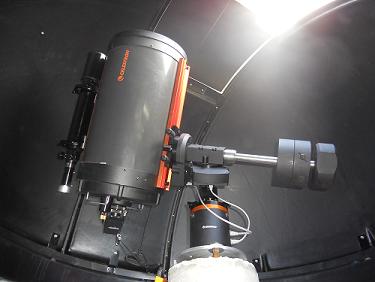
Although the Celestron CGE
1400 Optical Tube is very high quality, the focuser was not sensitive
enough for precise focusing. Again after talking with Dr. Moody, he
said to purchase a “Feathertouch MicroFocuser”. I found
one at Starizona.com. For
fine-tuning the focus, this addition to my scope has been worth its
weight in gold. Course adjustments are made using the large outer
focus knob, and fine adjustments are made using the brass fine-tuning
knob. Below is a picture of the Feathertouch MicroFocuser attached
to the visual back of my scope. The instructions were easy to follow
the installation was very easy to do.
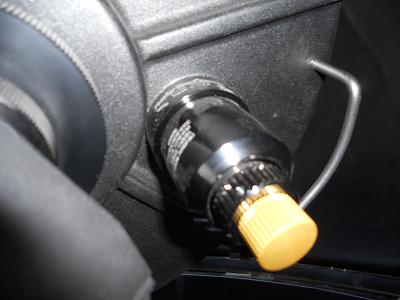
The Feathertouch
MicroFocuser on the scope visual back
The Guide Scope and Autoguider
Camera
In April 2020, I purchased a new ZWO Autoguider
camera to replace the StarShoot Autoguider Pro which failed. Pictures
of the new camera are shown below.
After dabbling with piggyback astrophotography, I had
the urge to use the C 1400 as a prime focus lens for the Nikon D3
DSLR Camera. The learning curve was stiff and I didn't know much about
precise polar alignment or autoguiding. The first picture we took
was a complete failure. The star trails were “zig zag”
patterns. I thought something was wrong with the mount. After much
studying, I realized that a “Two Star Alignment with “Calibration
Stars” was not the same as a precise Polar Alignment. (See my
Tutorial about Polar Alignment) The next set of pictures were better,
but I could only take about a 2.5 minute picture without the stars
beginning to become oval in shape. Thus the guide scope was purchased.
I purchased the Celestron 80 mm Guide Scope because I like things
to match. I also purchased the Orion StarShoot Autoguider Camera.
This little camera was reasonably priced and easy to use. It has not
failed me yet in finding a guide star. We have been able to take 20
minute exposures displaying completely round stars. Below are pictures
of the Celestron 80 mm Guide Scope and the Orion StarShoot Autoguider
Camera.
On January 30, 2016 I received a new autoguider camera.
The StarShoot Autoguider Pro is more sensitive and smaller than its
predecessor.
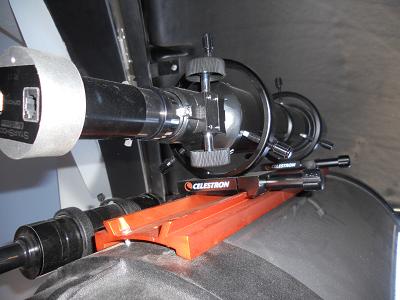
Guide Scope
and Camera Setup
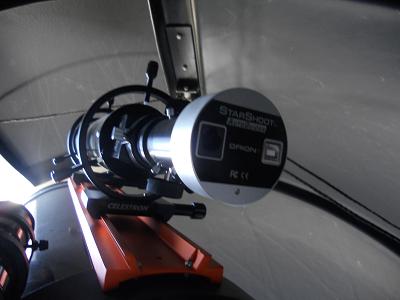
Orion Starshoot Autoguider
Camera (Replaced)
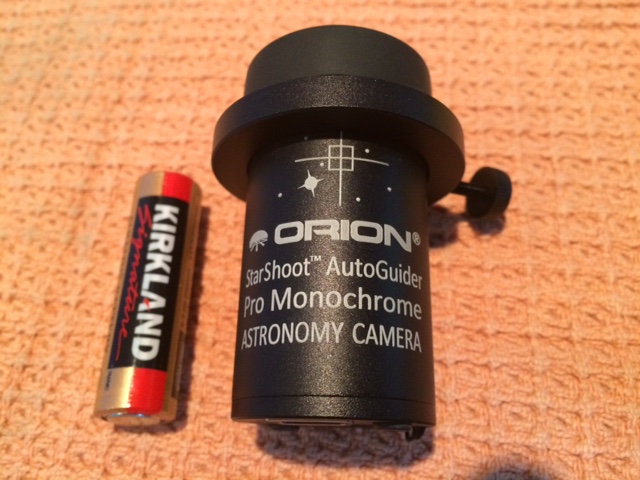
AutoGuider Pro Camera Front View (Replaced)
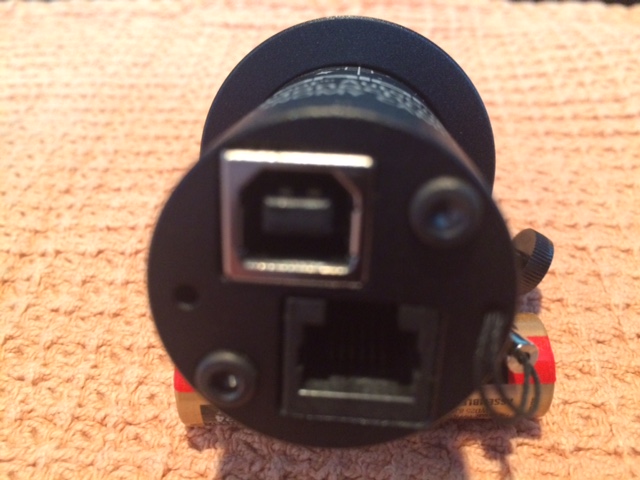
StarShoot Autoguider Camera Port View (Replaced)
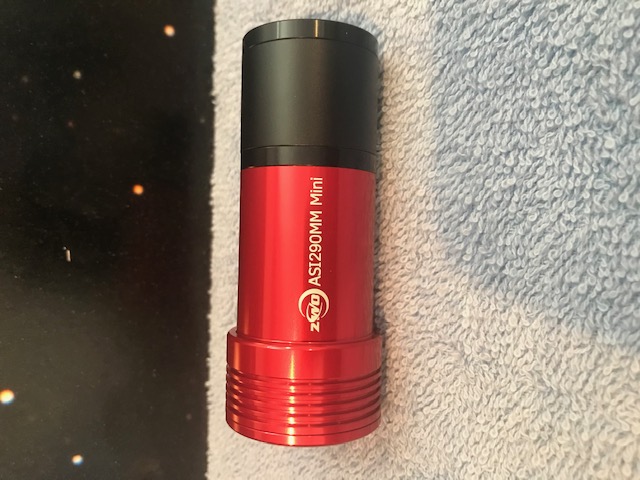
ZWO ASI290MM Autoguider Camera Side View
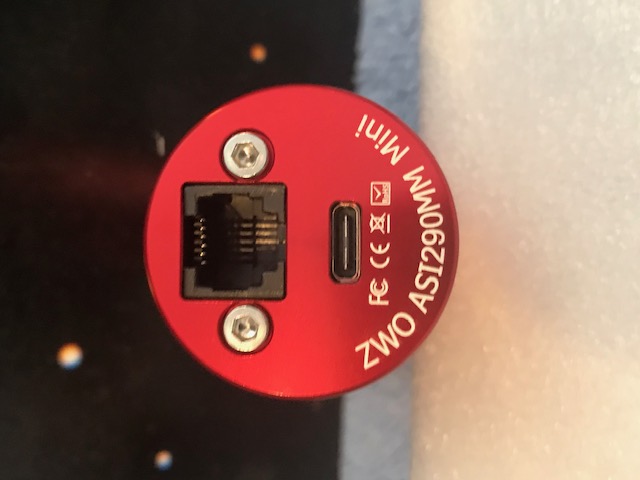
ZWO Autoguider Port View
Eyepieces
For visual observing, the selected eyepiece gives
the field of view and the "Power" to the telescope. The
CGE 1400 comes with a 40 mm Plossl Eyepiece as standard equipment.
For different viewing and power, more eyepieces need to be purchased.
The larger the "mm" size, the lower the viewing magnification
or power but wider field of view. For viewing planets, small "mm"
size gives higher magnification thus more detail. For deep sky objects
such as galaxies or nebulas, larger "mm" size, lets in
more light and gives a wider field of view. The choice of eyepiece
depends on what you are looking at.
The Celestron Corrector / Reducer
changes the focal ration of my scope to f7.1. This gives me a larger
field of view and decreases the time I need to expose a given shot
by about 4 times. It does give a halo around the object I am photographing,
but this can be compensated for by stacking techniques using flats
(white/bright background pictures) when the image photos are stacked.
I presently have the following Eyepieces, the magnification
is dependent on the Focal Length of the scope that is being used
and is representative of my CGE 1400 at a focal length of 3910 mm.
Celestron 40 mm Plossl 1.25 inch barrel. Magnification
x 98.
Celestron 19 mm Axiom LX 2 inch barrel Magnification x 206.
Custom Made 85 mm Plossl 2 inch barrel Magnification x 46.
Celestron Corrector / Reducer F/6.3 (f7.1 for my scope)
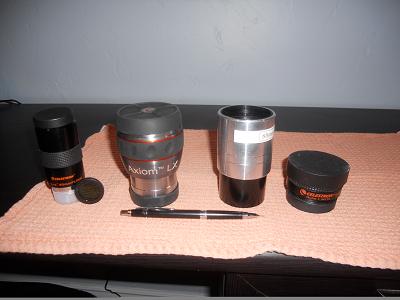
Left to right: 40 mm, Moon
Filter, 19 mm, 85 mm and Corrector Reducer.
Imaging Camera
Four things are essential for good astrophotography.
A good Equatorial Mount, the imaging scope, the guide scope, and the
imaging camera. I have talked about the scopes and mount above. Here
I talk about the camera. I am presently using the full frame 12 Mega
Pixel Nikon D3 digital camera. Traditional Astrophotographers use
specially designed cameras that are used just for astrophotography.
I chose to use a multipurpose camera that can be used for everyday
use and for astrophotography. For one thing, my son already had the
camera. Therefore it did not cost me anything to use it.
This camera can be used without the need for "Stacking"
pictures with specialized software. The Nikon uses internal noise
reduction techniques and therefore using it is more like using a traditional
camera for landscape pictures. You set the ISO or "Film Speed",
for lack of a better descriptive term, and the shutter duration. The
lower the ISO, the less "noise" and better quality of the
photograph. The D3 can take very good pictures at 2000 ISO and lower.
The higher numbers can cause more noise, but are still acceptable
at least to me. See the "Bodes Galaxy" in the gallery. It
was taken at 3200 ISO and still looks good. If I desire to shoot above
3200 ISO and reduce the shutter duration, stacking is used to further
reduce noise. For a comparable dedicated astrophotography camera,
you would spend approximately 3 to 5 thousand dollars. The D3 is more
versatile and costs approximately $3,000 on the used market in 2011.
I also have a hand controller for the camera to set the shutter duration
when the camera is on "Bulb" mode.
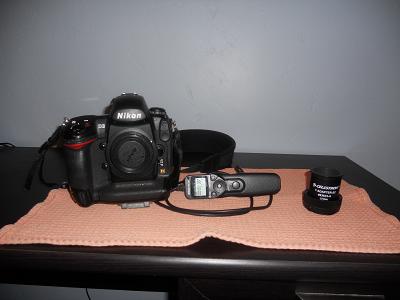
Left to Right: Nikon D3, Hand Controller,
and T-Adaptor for connecting to the Scope. (Replaced)
In July 2012, my son Brent purchased a Nikon D800 and
I purchased the D3. This camera has the same light sensitivity (ISO)
as the D3 but has 36 MP. I now have access to two professional cameras
when I do astrophotography.
On March 26, I received my new NIkon D5200 Camera. I
had the camera modified to allow the full light spectrum including
IR to be exposed. I also had a chip cooler modification applied to
the chip. This modification was done by Spencer
Camera and Photos. For anyone doing astrophotography with a DSLR,
I would highly recommend them to modify you camera. The reason I purchased
this camera is to allow me to use the Hyperstar lens provided by Starizona.
This camera has a 27 mm diagonal chip where as the D3 has a 43mm diagonal
chip. The Hyperstar lens is optimized for the 27mm format. The camera
is lighter, at 1.9 lbs which makes me have a more comfortable feeling
when connecting it to my corrector plate. I have not purchased the
Hyperstar lens yet, but when I do, I will be ready. The Nikon D5200
also has HD video capability, which will open up a new world for taking
pictures of the solar system.
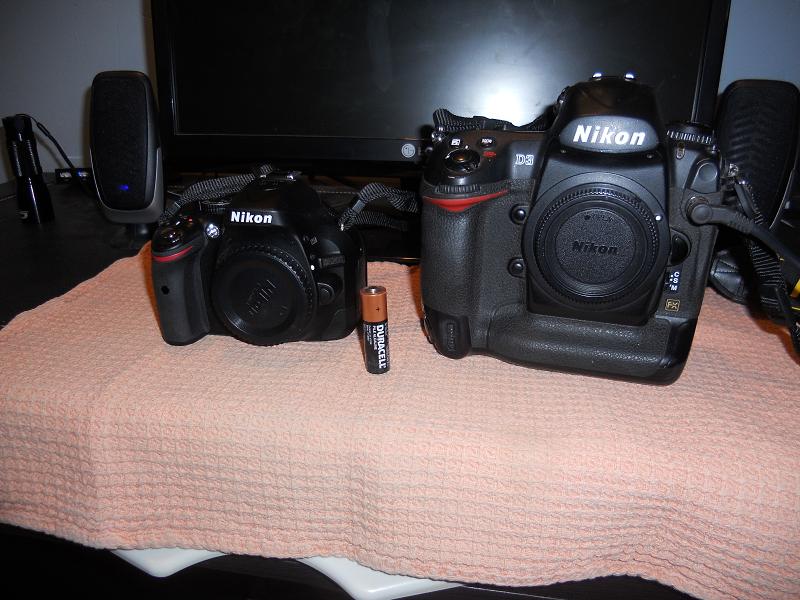
Comparison between the Nikon D 5200 on the left and
the Nikon D3 on the right. The D5200 is about a pound lighter and
has a much smaller profile. This will aid when I place the camera
on the Corrector Plate of the scope when using the Hyperstar System.
The "AA" battery is used to give perspective of the size
of the cameras.
Nikon D810A
The latest addition to my camera suite is the Nikon
D810A. I have essentially retired my D3 and use the 810A camera as
my primary astrophotography camera The D5200 is now the backup. This
new camera was designed by Nikon specifically for astrophotography.
The Infrared filter has been tuned to allow for the IR light component
to pass through and not be filtered out. The ISO capabilities are
astounding which will allow for me to take very good pictures with
low noise at an ISO of 6400. I try and shoot around 3200 or lower,
but if necessary I can shoot at the higher ISO and get good results.
The camera is 36.3 MP which allows for excellent resolution when the
raw photos are enlarged. The cost is steep for a DSLR. It runs about
$3,200.
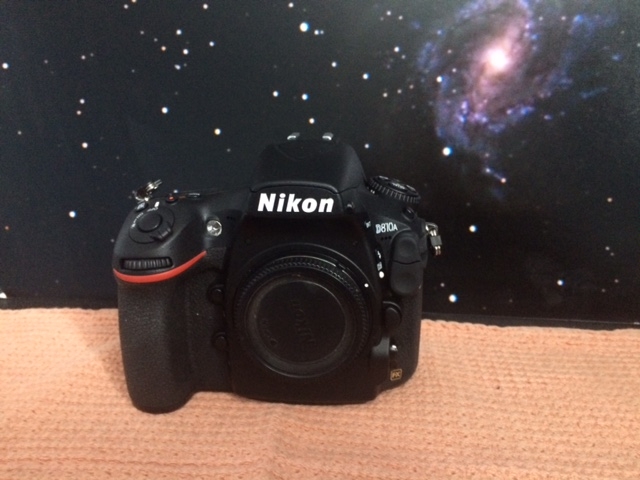
Nikon D810A
Filter Box and Filter
In December 2012, I purchased a Filter Box and an IDAS
Light Pollution Suppression Filter. The filter box will allow me to
purchase and use any 52 mm or 48 mm filter. I purchased the box and
filter from Astro-Hutech.
I can now enter the realm of Narrow Band Imaging. The Filter Box and
filter is shown below.
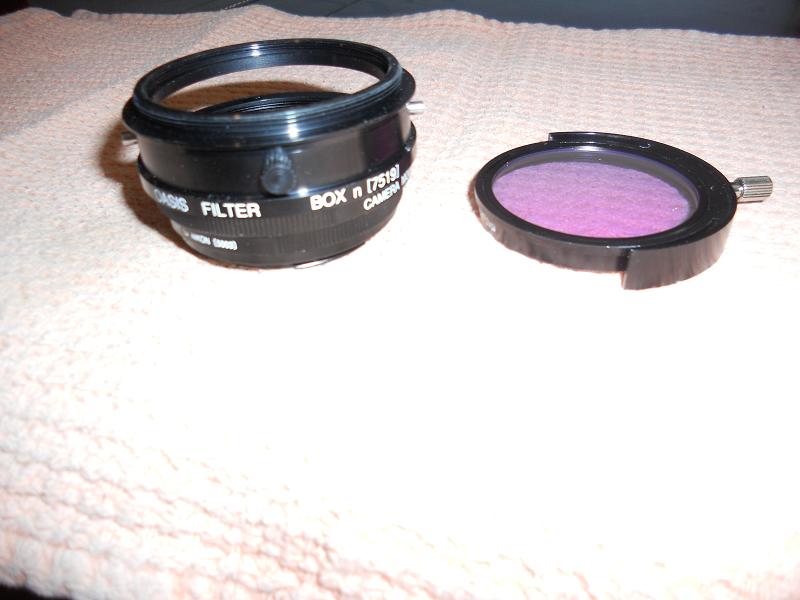
Filter Box and IDAS Pollution Suppression
Filter in its holder.
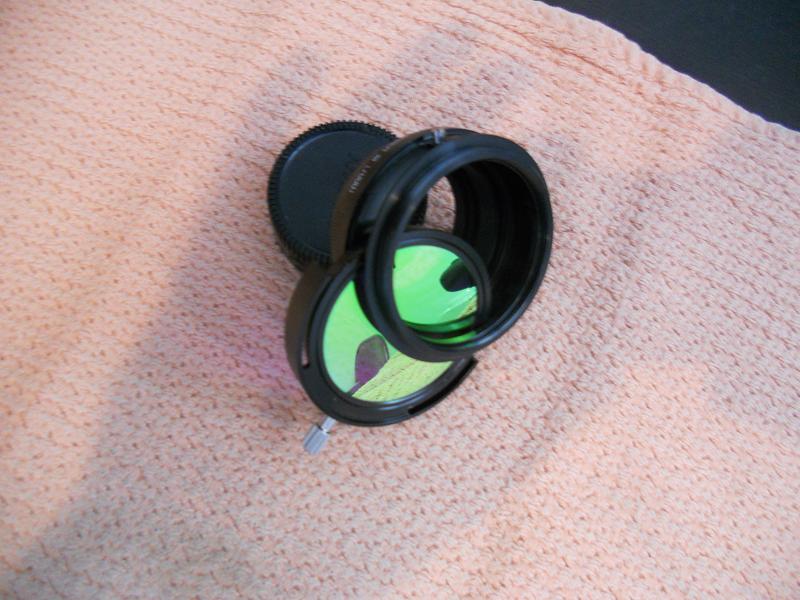
Inserting the Filter into the Filter Box.
The Filter Box screws directly onto the Visual Back
of the Scope. With the Filter Box, I also purchased the Nikon Adapter
which attaches to the Filter Box. The Camera attaches directly to
the Filter Box. With this arrangement, I can change filters without
removing the Camera. Extra Filter Holders can be purchased from Hutech.
I am extremely pleased with the quality and how solid the filter box
is. There is no flexure between the camera and scope.
Hand Controller Extension
When it is cold during the winter months, the Celestron
Hand Controller display becomes very sluggish. Therefore I purchased
25 feet of 6 conductor Line Cable with RG 25 connectors and ran the
cable directly into the warm room. This way I can center the scope
or use Precise GO TO from the comfort of my computer chair. With Live
View activated from my Camera, I can see what the scope is pointing
at. It will only be used when I am taking pictures. For visual use,
I will connect the Hand Controller directly to the scope. I know I
could have used NexRemote and it works well, but it causes a conflict
with Stellarium when both are used simultaneously. One thing to note
if an extension is used, it that the 6 conductors and their colors
need to match up and not be rolled.
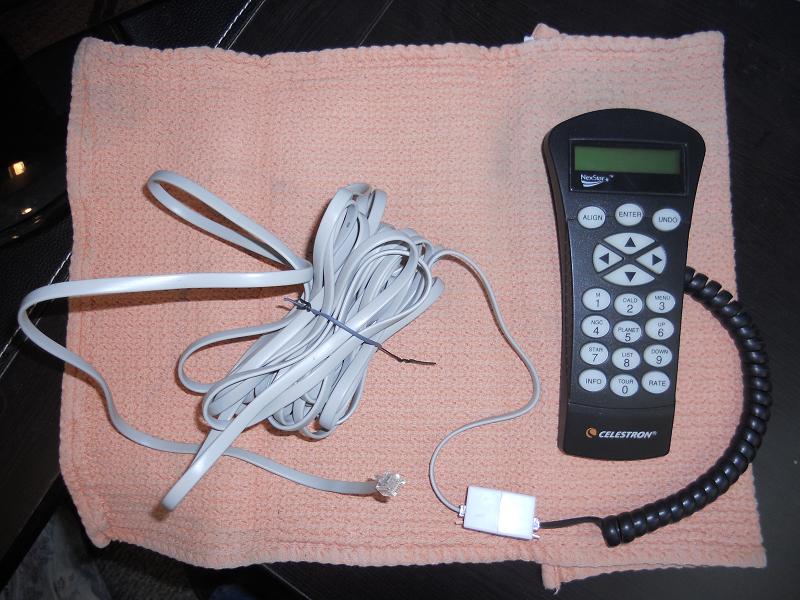
25 feet of cable and a Coupler to connect
the Controller from the Warm Room.
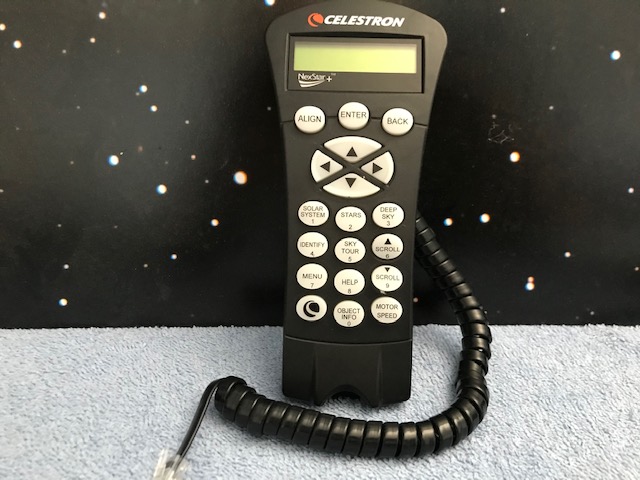
New Celestron NexStar+ Hand Controller (Similar
to the one above only newer).
Micro Touch Auto Focuser
I purchased the Micro Touch Auto Focuser from Starizona
(Starizona.com). This device will allow
me to focus the telescope through the computer from the warm room.
It will allow me to focus the scope either manually using the "In"
or "Out" buttons. It can also be used automatically to focus
the camera through a computer. I purchased the wireless version so
that I will not be tethered to the remote unit while in the warm room.
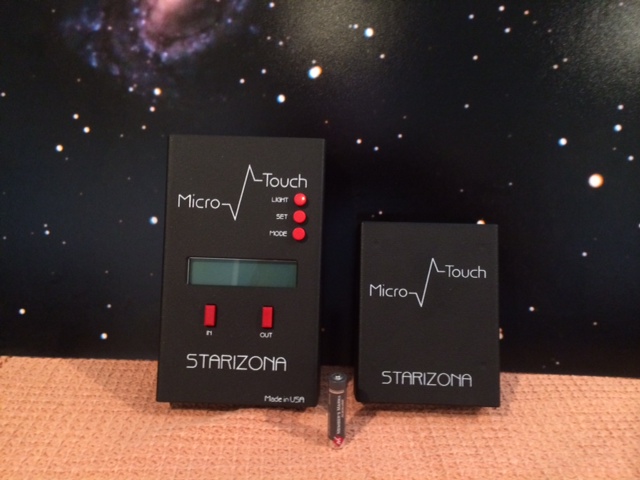
On the left is the Hand Controller. On the right is
the remote unit which controls the focusing motor. A "AAA"
battery is used to give scale to the image.
Tele View Powermate and Eyepiece
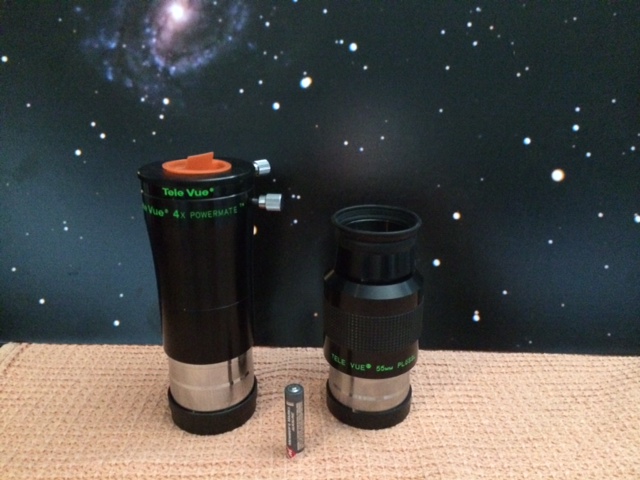
The Tele View 4X Powermate is on the left and the 55
mm Tele-View Plossl is on the right. Using both together, I get a
magnification of around 284x. This is an optimum power level for viewing
planets as long as the sky is clear and still. The powermate also
quadruples the the image size directly into my cameras giving large
photos and movies of planets.
HyperStar Lens
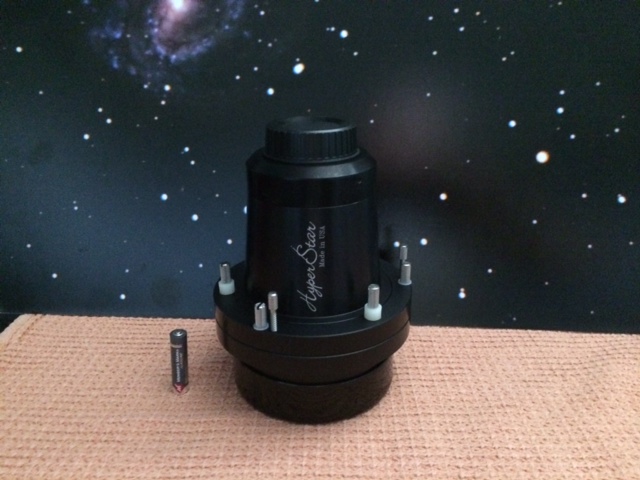
The HyperStar lens shown above will give me a 14 inch,
f/1.9, 675mm imaging machine. With this I can get incredible pictures
in a short period of time and a wide angle.
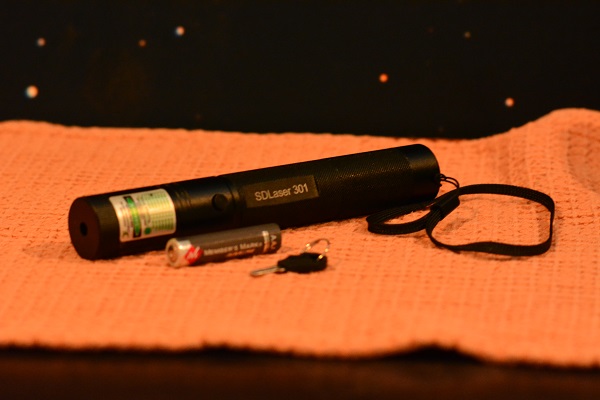
Astronomy Pointing
Laser
To aid in pointing out Constellations, Planets and Stars,
I purchased a 5 mW Laser about 1 year ago. This laser did the job,
but it was not bright enough and kept fading until it was no better
than a presentation pointer. Therefore I purchased a 500 mW Laser
for astronomy purposes. This laser was purchased from Laserpointerpro.com.
The laser has a strong green laser that can be seen very well with
large groups when pointing at celestial objects. This is a powerful
laser and it has a key to keep it safe when children are around. I
keep the key locked up in another drawer from the laser. So far I
have been very satisfied with the laser. If someone is thinking of
purchasing a laser from Laserprinterpro.com,
the price is right, but the shipping took almost 3 weeks. The web
site said 6 to 8 days, but it was much longer. If you have the patience
to wait, then this is a good place to purchase a laser. They have
a huge selection. A picture is shown below. The AAA battery is shown
for scale only. The actual laser comes with a Li battery and charger.
Software
For controlling the scope, camera, and guide scope
I use the following software: