This Web version is no longer being updated
Search for Dry Creek View
Observatory in your Search Engine. Then update your favorites
Or Click the link below then update your
favorites
Dry
Creek View Observatory New Version
With a break in the cloudy skies, I ventured into the
world of low altitude galaxy photos in the southern sky. I took the
following photo of the Sombrero Galaxy (M 104). This photo was shot
at ISO 400 and a duration of 2 minutes at f/2 and approximately 600
mm focal length. This was achieved using my HyperStar lens. I also took
one at 3900 mm focal length at ISO 12800 and a duration of 7 minutes.
I need to work on the long focal length so I can get the ISO down to
around 3200 and have some stacked images. This is a much longer and
difficult process at this focal length due to the longer duration shutter
speed that is required. Each photo would need to be around 20 minutes
at ISO 3200. The results however would be a much more magnified image.
I hope to try this in the future when I have good clear skies. That
said, the image below will need to suffice.
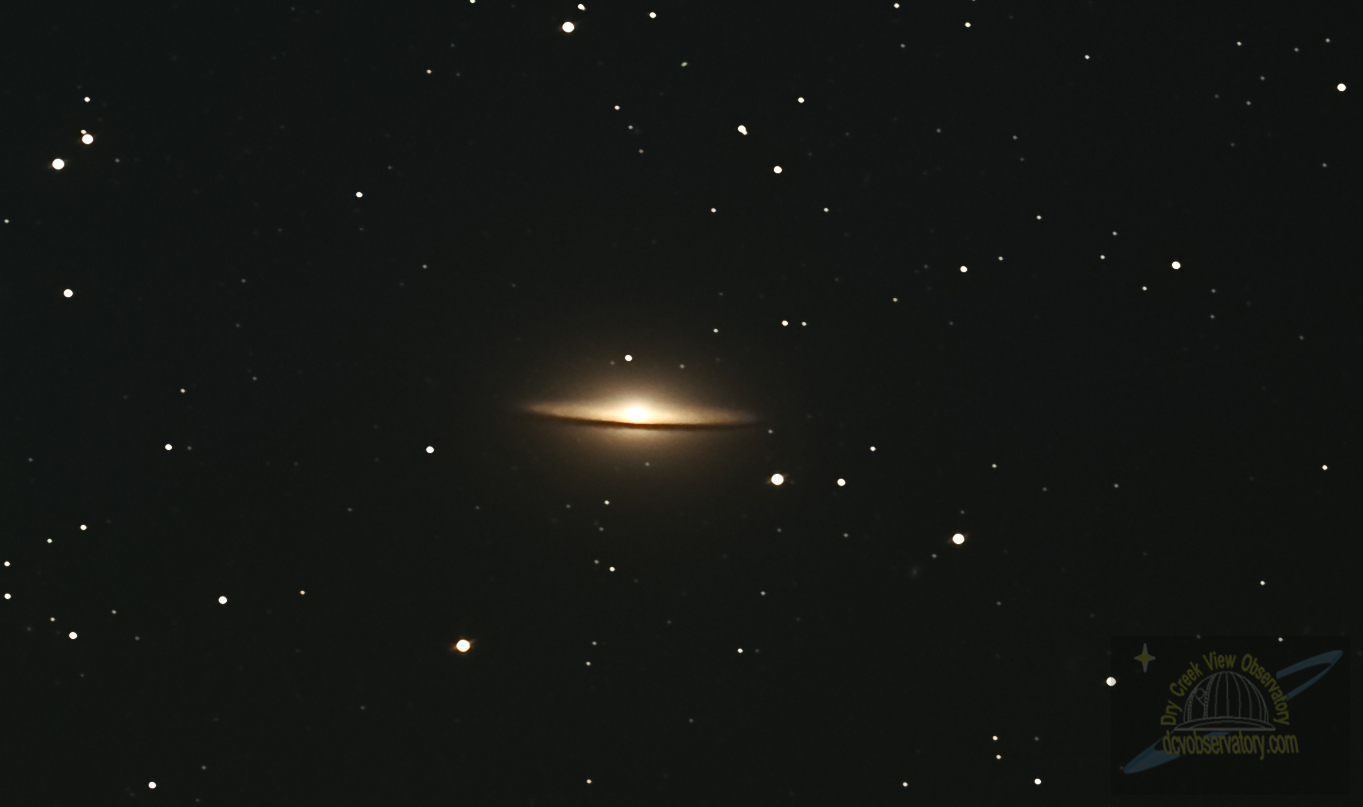
Sombrero Galaxy M 104
May 19, 2020
No pictures taken for a while, due to poor weather conditions.
This has been problematic for me as I purchased a new Hand Controller
and a New Autoguider Camera. My original hand controller that came with
my Celestron CGE Mount was having problems with the buttons. As it is
10 years old and well used I was not surprised. So I purchased a new
Celestron NexStar+ Hand Controller. This controller is used on the newer
Celestron Mounts, but with a flash software upgrade to my mount, it
works as needed. There are problems using this controller to connect
to Stellarium so guests can see where the scope is pointing. The mount
still wants a Serial Input, and the new controller only has a USB input.
This causes a conflict when connecting to Stellarium and it will not
work. To overcome this problem, I calibrate the new controller and use
it for finding and slewing to objects. I use my old controller and plug
it into Aux Port 1 on my mount. I do a quick align on that controller
and with both controllers connected, I can connect Stellarium to the
old controller and use the new controller for finding objects. It was
fun to make this work. Now when I have guests over to the Observatory,
they can see on my 32 inch monitor where in the sky the scope is pointing
using Stellarium.
As for the Autoguider Camera, my StarShoot Autoguider
Pro camera was having problems with intermittent disconnection when
autoguiding. As you can imagine, this causes problems with long exposures.
So forked over about $300 and purchased a new ZWO- ASI290 mini autoguider
camera. The camera is very sensitive and works perfectly with PHD 2
Software. You can see pictures of both the Hand Controller and the ZWO
Camera in the Equipment section of this web page.
April 20, 2020
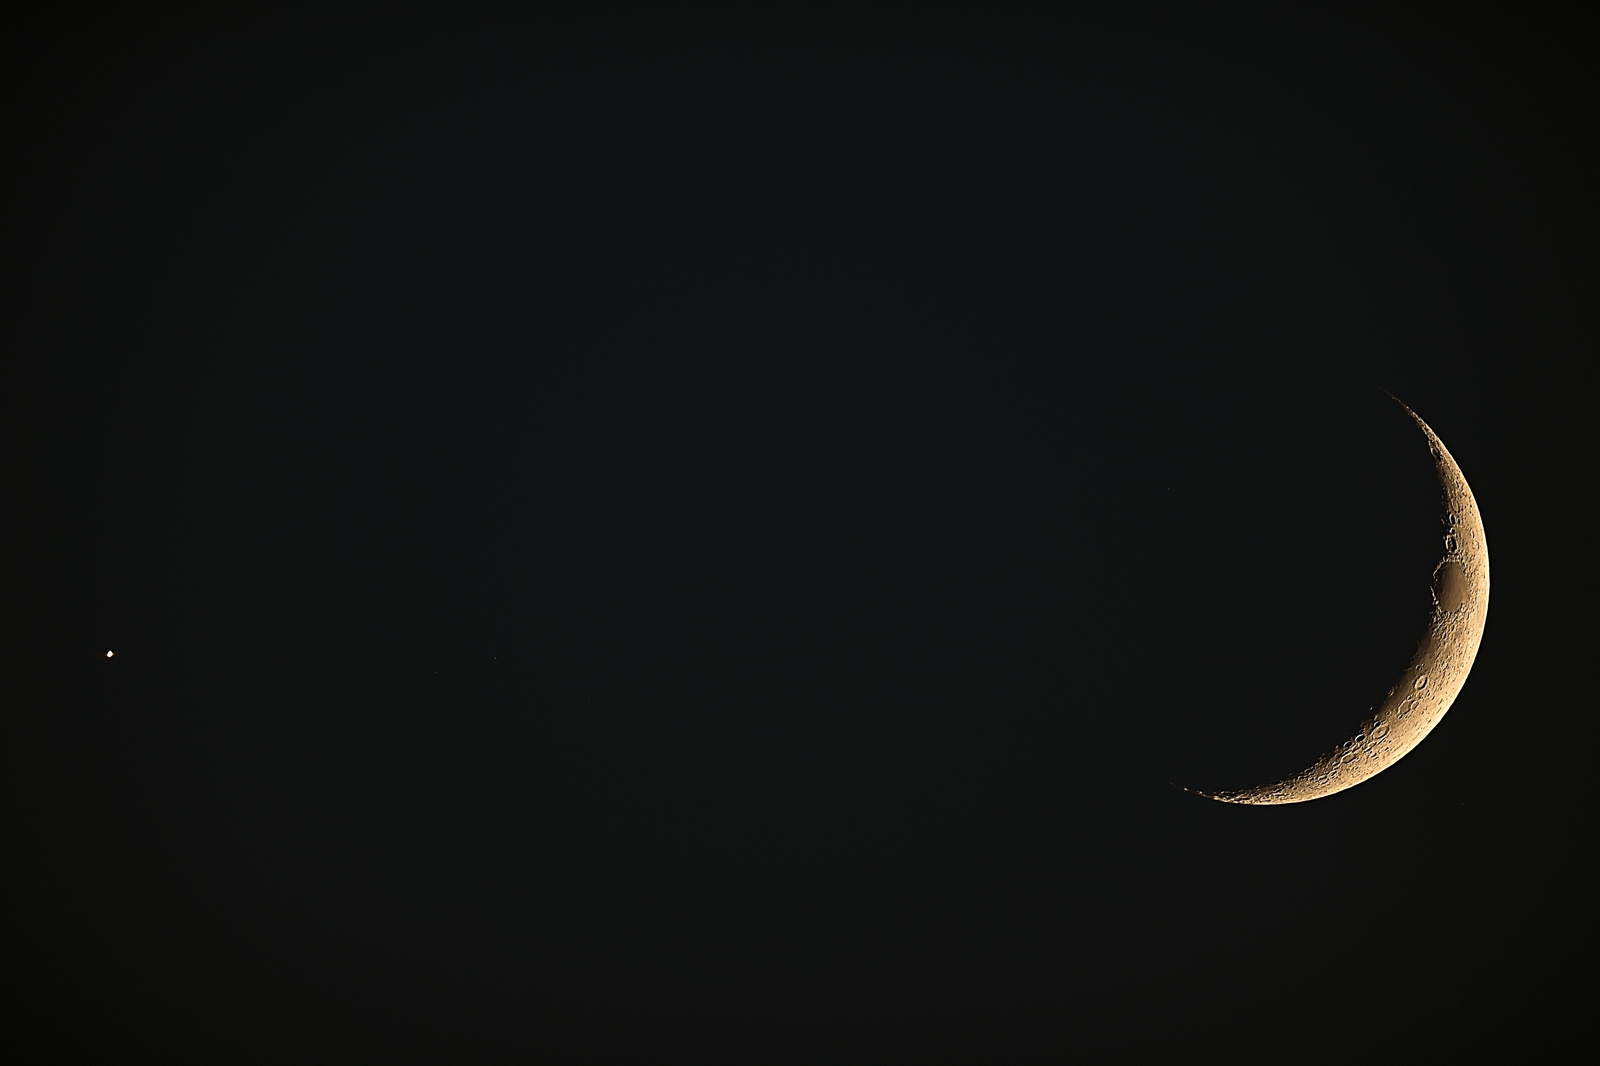
With Venus at its "Elongation" predicted on
March 24, I finally got a chance to get a photo of it on April 14. Elongation
is when you can see 50% of the planet disk. This the precise elongation
actually occurred on March 21. Since I took the picture on April 14,
I missed the exact elongation. This is evident by the fact that the
"Terminator Line" between the upper point and the lower point
is curved. If I would have taken the picture on March 21, the "Terminator
Line" would have been perfectly straight with no curve. This can
be seen in the picture below.
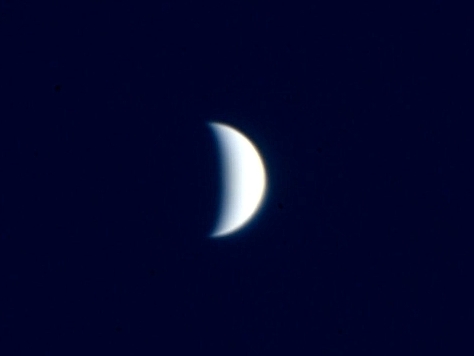
Venus taken 3 weeks after "Elongation"
The interesting thing about Venus and Mercury is that
these planets appear from Earth as a crescent. This is due to the fact
that these two planets orbit between the Earth and the Sun. All of the
outer planets appear as full discs.
December 1, 2019
I added a security certificate to all of my primary web
tabs. It is shown at the bottom of each page.
November 23, 2019
I took this picture of M 27 the Dumbbell Nebula on October
20, 2019. As with my last picture of M 51, I am updating my photos using
my Nikon D810A. This picture is much more detailed than the one I took
in 2015. Both used the Hyperstar Lens, but the difference is in the
camera. I stacked 34 pictures using "Images +". The camera
ISO was 1600 and the shutter speed was 25 Seconds.
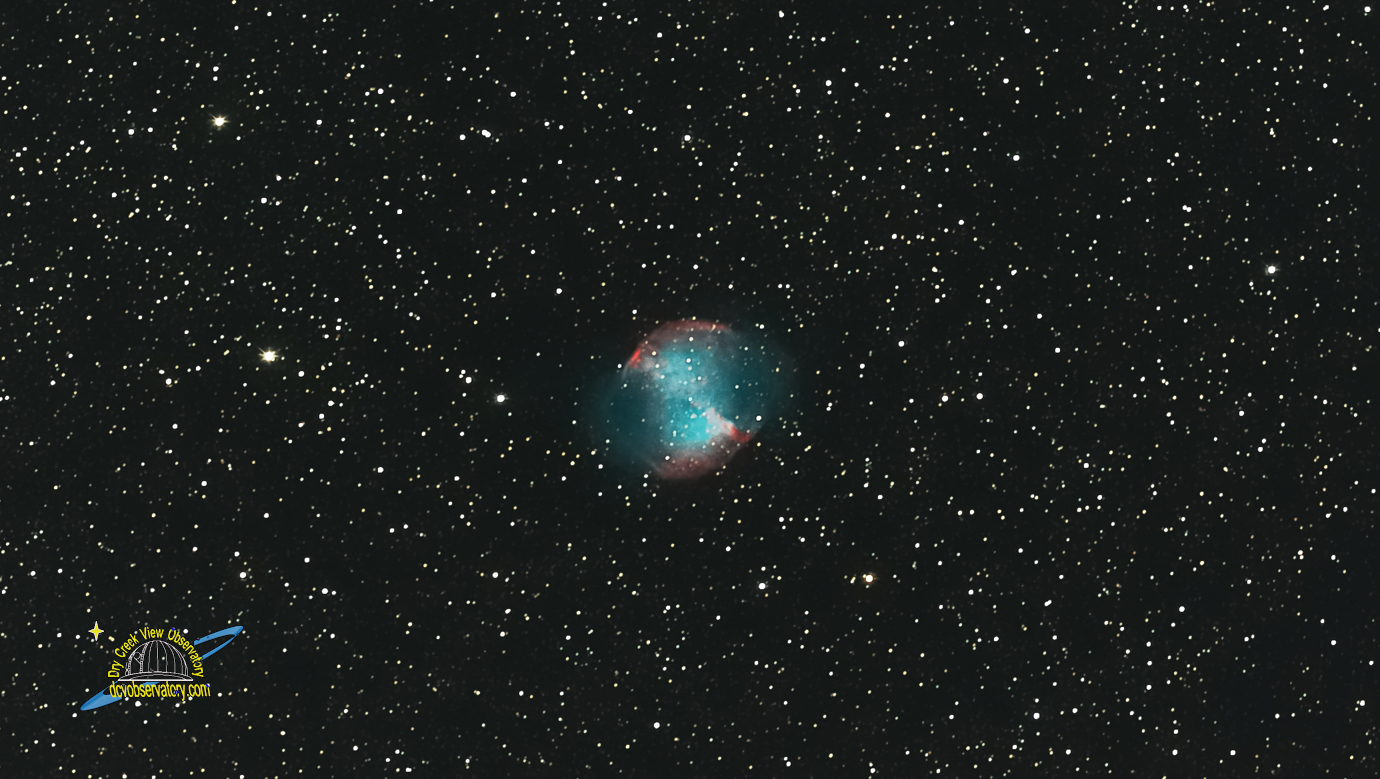
M 27 Dumbbell Nebula
November 17, 2019
I finally got around to doing some processing on M 51
the Whirlpool Galaxy. I have taken a picture of this before, but this
time I used my HyperStar lens and my new Nikon 810A camera. With a wider
field of view, I was able to capture two other Galaxies in the photo.
They are left of M51 looking to the upper left corner. I believe they
are IC 4263 and IC 5169 Galaxies
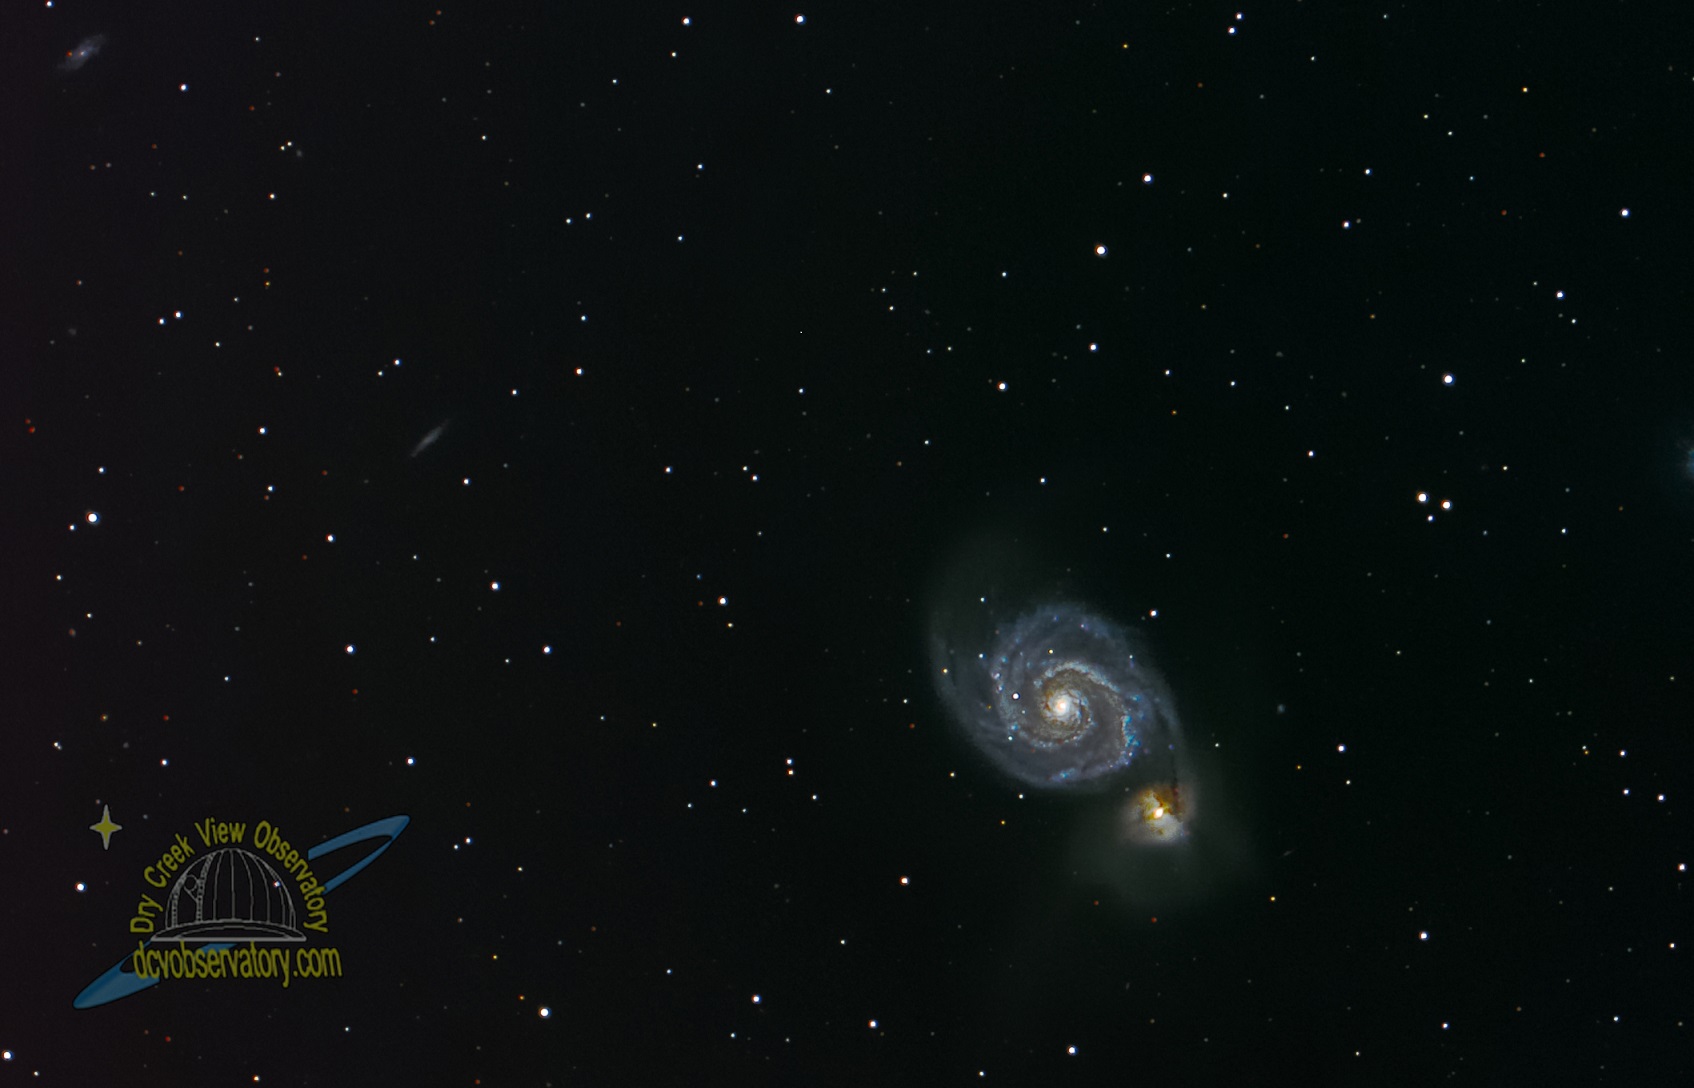
M 51 Whirlpool Galaxy
August 26, 2019
It has been months since I have had a chance to do some
star gazing at the Dry Creek View Observatory. I have been away from
home for the past 4 months doing some consulting work. Now that I am
home, taking pictures of the cosmos is calling me. I took the picture
below on August 25, using my Nikon D810A. This camera is amazing. I
shot the picture at 12800 ISO for 10 seconds.
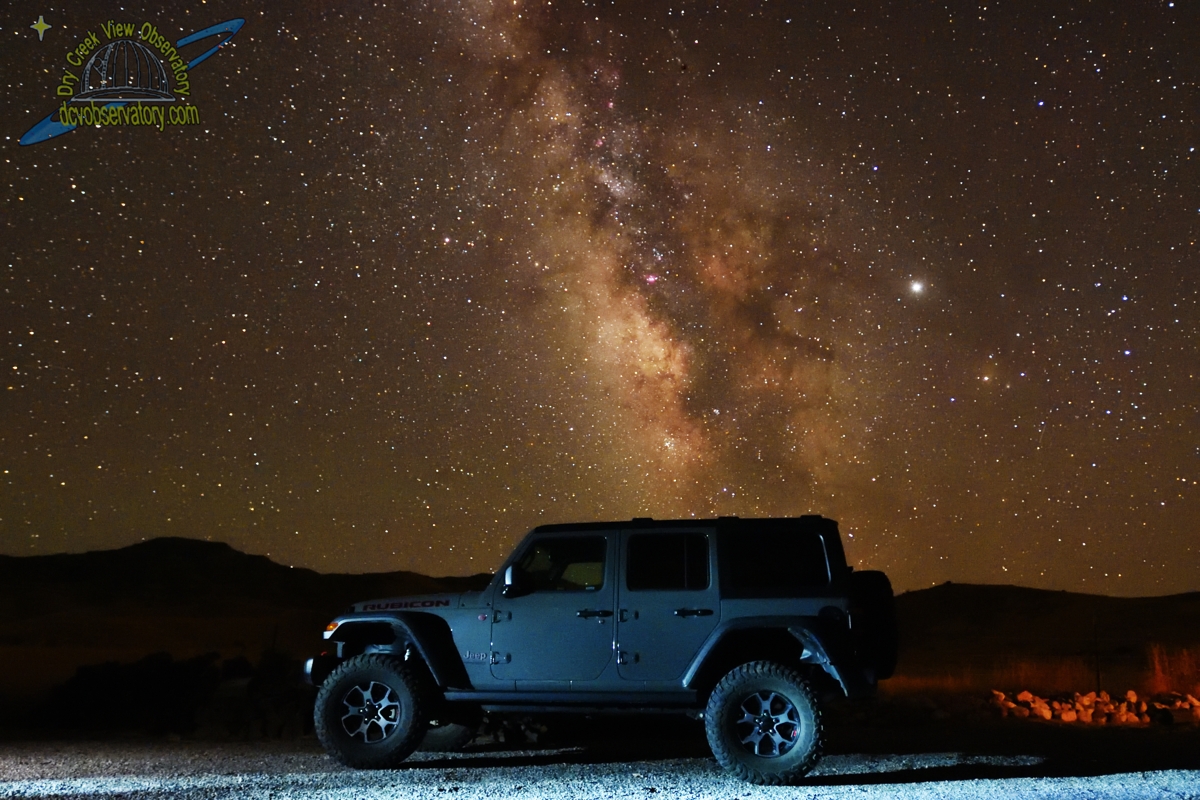
Terrestrial and Celestial Wonders
February 5, 2019
Today I was playing with my post processing software on
the same M 78 data that I posted yesterday. I used Nikon Software "Nikon
NX-D and Nikon NX-2) The newer version NX-D has some tools that is not
in NX-2 and vise versa. Using both, I was able to process the data and
as far as I am concerned the new image has much more detail. The new
image is shown below. Compare it to the Image of M 78 shown on February
4.
M 78 Post Processed using Nikon NX-D and NX-2
Taken January 31, 2019
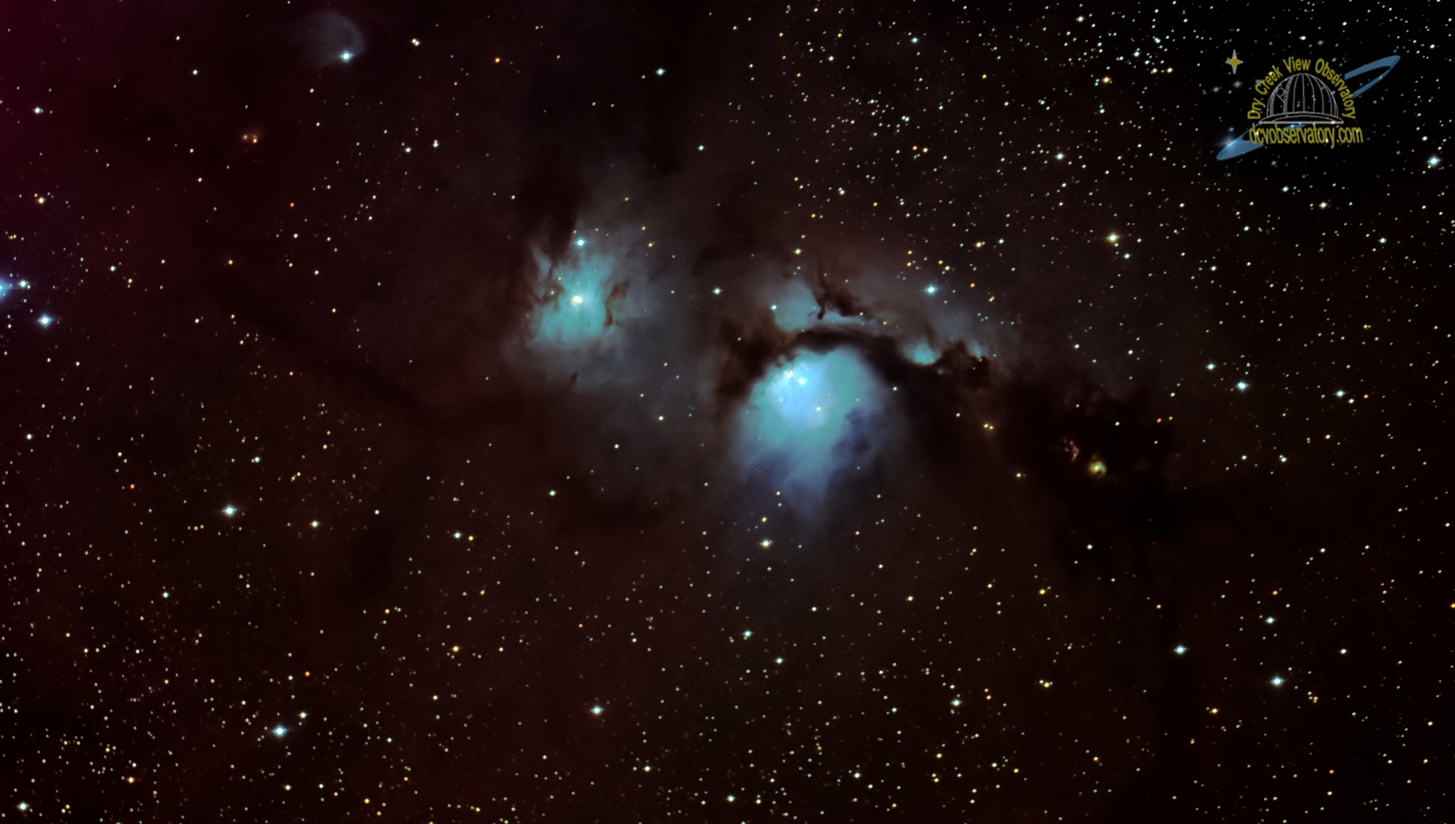
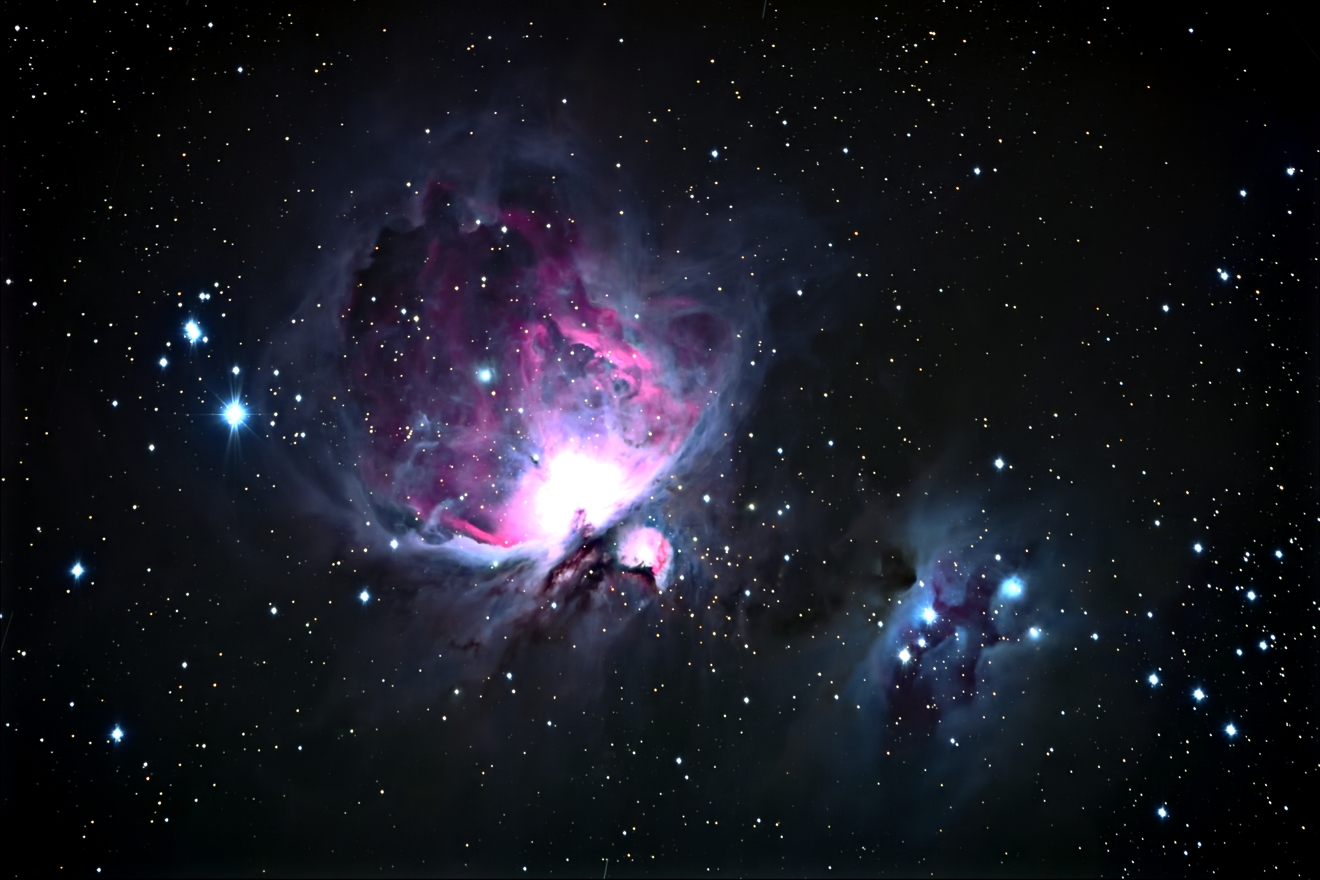
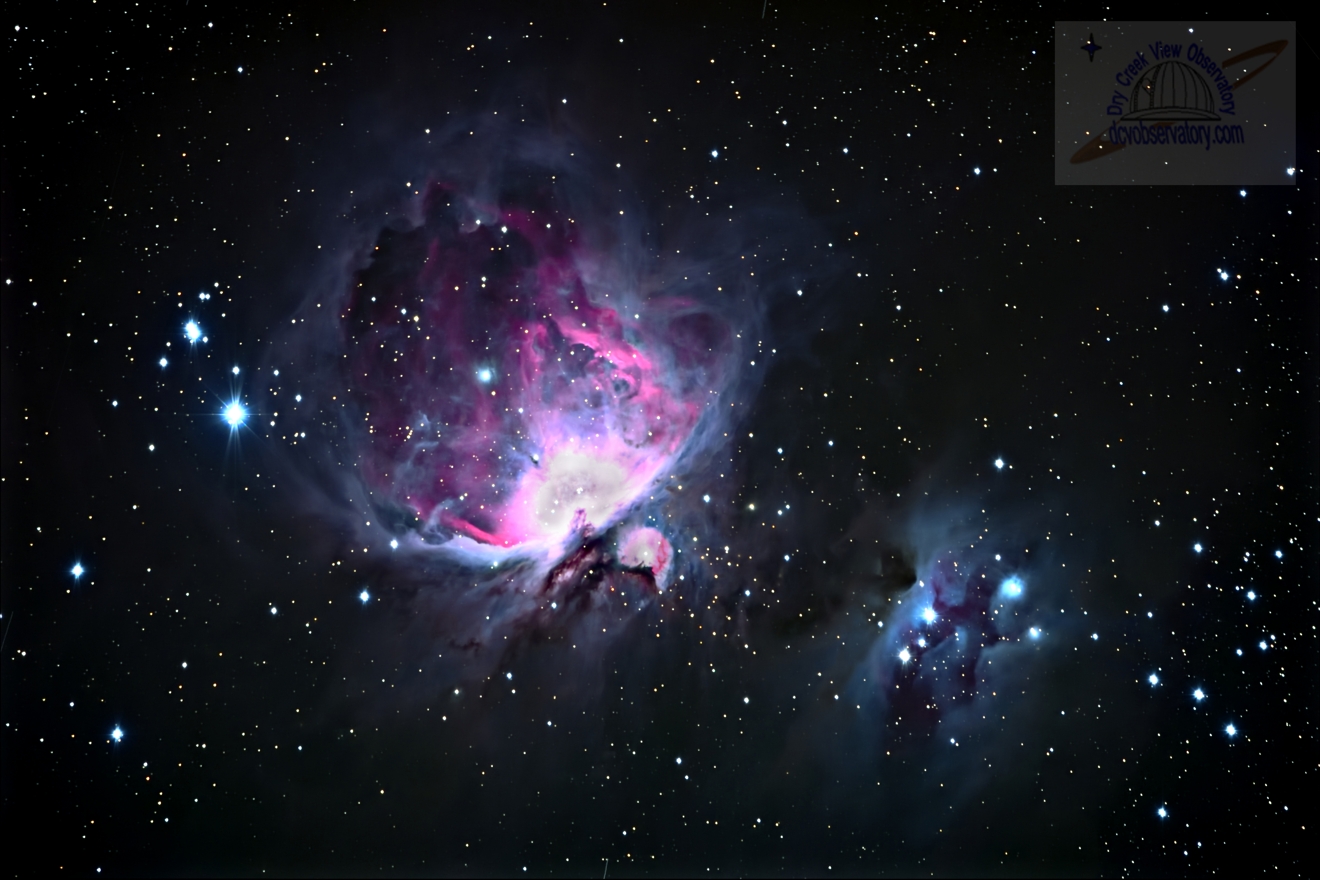
February 4, 2019
I had a beautiful night on January 31 to take some pictures.
The first picture I took was of M 78 which is a diffuse reflection nebula
in the constellation Orion. The second picture was of M 42 the Great
Orion Nebula, but this time I wanted to take a picture of the Heart
of the nebula showing the stars in the trapezium. I have done this before,
but this time I used the Nikon D810A and shot it using my HyperStar
Lens The object of taking the M 42 picture was not to capture the nebulosity,
but to show the stars of the trapezium. The pictures are shown below
and are in the Gallery for a larger picture.
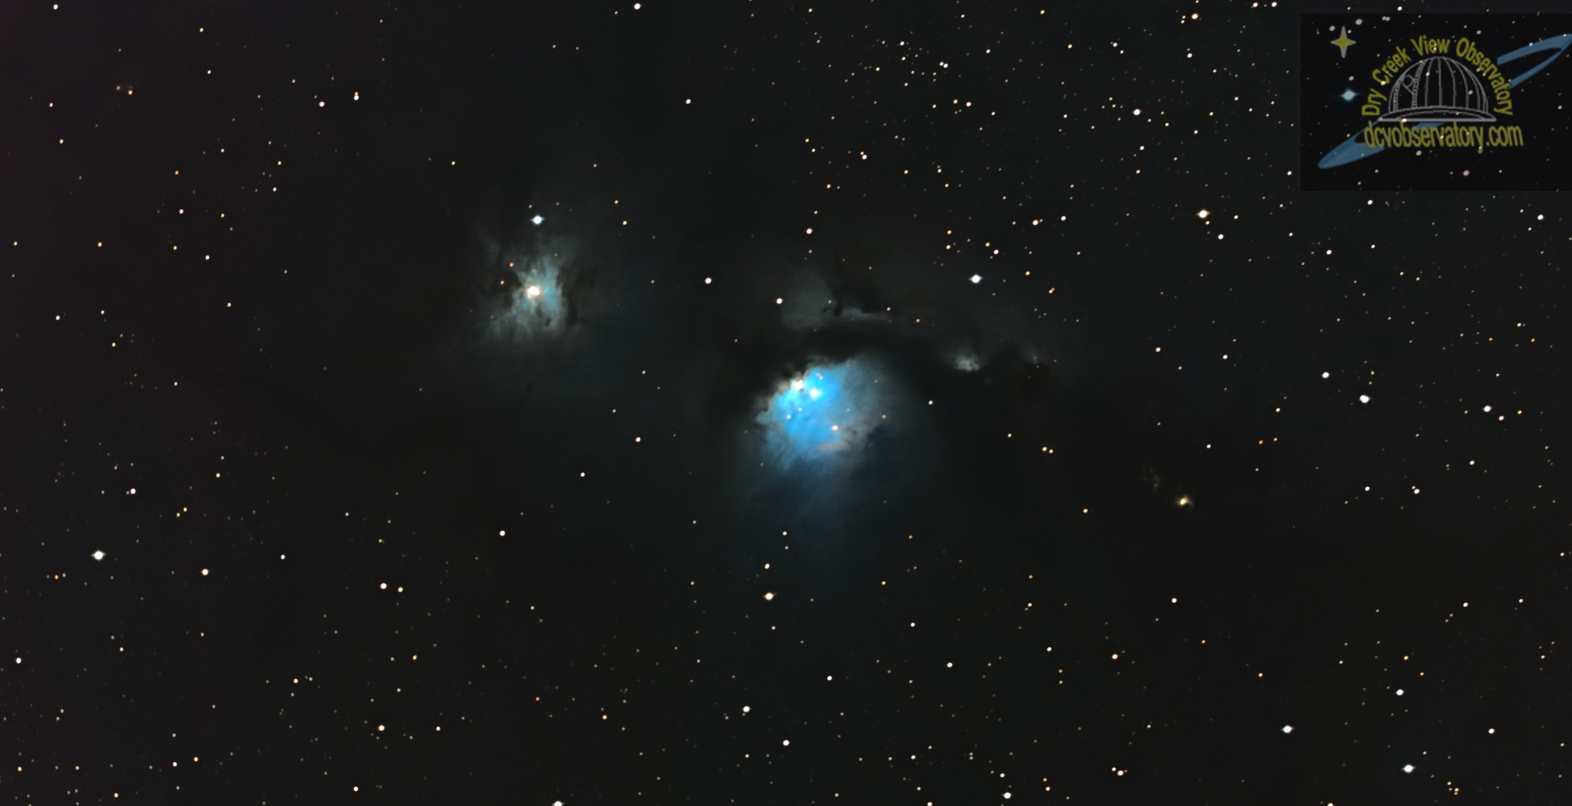
M 78 Taken January 31, 2019
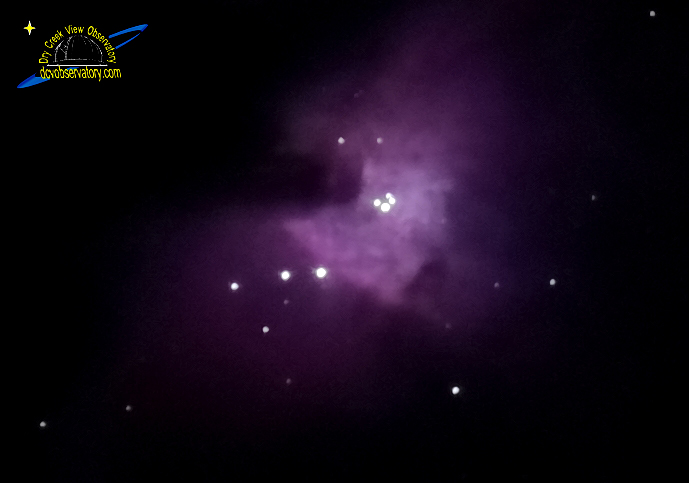
M 42 Trapezium
October 11, 2018
This past summer, as can be seen with the previous entries,
I have been photographing some of the planets. With Saturn, Jupiter,
and Mars being very prominent in the southern skies this summer. Mars
made its closest approach to earth on July 31, 2018. I photographed
the image below about a week later because the moon was full on July
31, and I wanted a dark sky. During a break in the clouds, I took the
following photograph. Although I took the picture of Saturn after I
took this picture, I just finished stacking and processing this image
last week. The image was taken with the Nikon D810A camera in movie
mode through my 14 inch scope and a 4x Barlow.
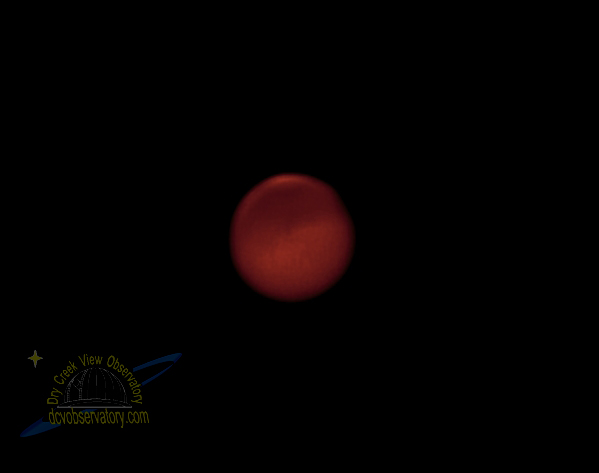
Mars Taken on August 6, 2018
September 25, 2018
Here is another attempt at Saturn. I used a 4x Barlow
through my Celestron 14 inch scope and my Nikon D810A camera in movie
mode. I also stacked the image using ImagesPlus. I can see that the
image is a bit soft or slightly out of focus. I will continue to try
and get a better image.
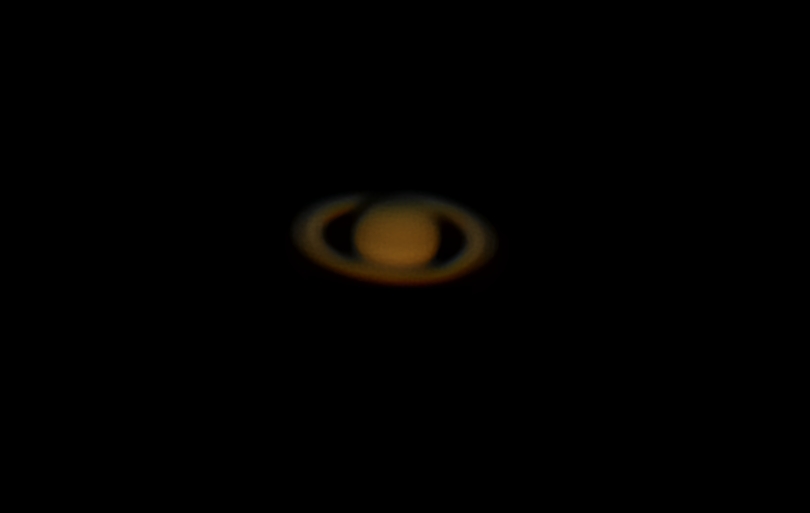
Saturn taken on September 20, 2018
July 25, 2018
On July 15, the Crescent Moon and venus were close enough
that I was able to take a picture with my HyperStar Lens and get both
in the field of view. Venus is obviously small and there is no detail
of the planet. The moon however looks good. When I walked outside, I
couldn't resist taking the picture. I was taken with my D810A camera
at ISO 200 and a shutter speed of 1/500 sec. The picture is shown below.
Moon and Venus July 15, 2018
I purchased "ImagesPlus V6.5" for my Astrophotography
Software. I have been researching which software will easily stack NEF/RAW
images from my Nikon D810A camera and I settled on ImagesPlus. It works
great and easy to use after viewing tutorials on Youtube. Now that I
have stacking/processing software I am making a file directory of "Flat
Frame Files" for use with my D810A camera. I use flat frames when
stacking to give a gradient on the corners of my pictures so I do not
have a bright center and dark corners. I'm different than most astrophotographers
in that I'm not a purest when it comes to flat frames. These frames
can also help get rid of dust aberrations on photos if your lens or
camera is dirty. Therefore, most astrophotographers take flat frames
at the same photo session as the light frames. Then during the stacking
operation the dust aberrations are removed. I have found that if my
lens and camera is clean, this is not a problem so I make a bank of
"Flat Frames" at all ISO and associated Focal Length settings
for use when I take pictures at these various settings. This works for
me, but some would say it is the lazy way out. As for me I have found,
"A difference which makes no difference is no different".
Using a bank of pre-shot Flat Frames VS shooting them at the time of
the photo shoot, makes no difference if the lenses are clean.
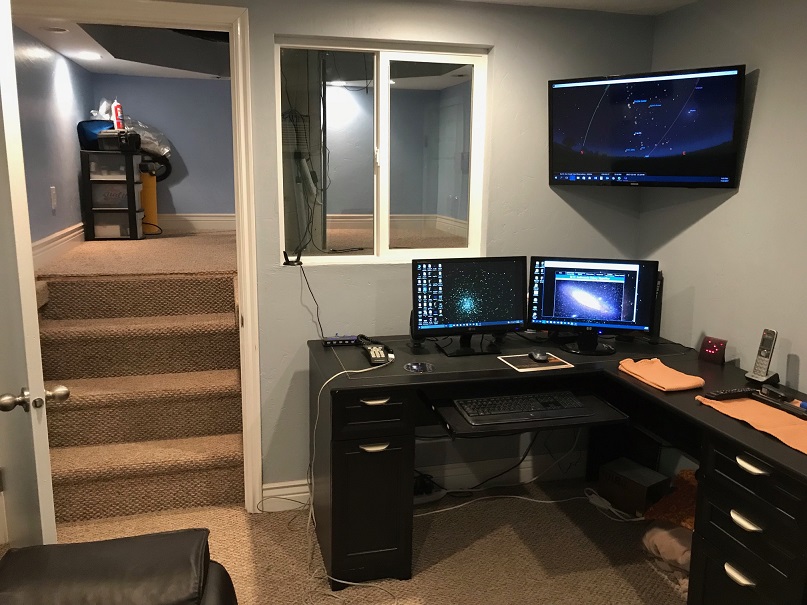
June 25, 2018
With a little time on my hands, I have updated the Observatory
Tab and the Equipment Tab. In the Observatory section, I show the addition
of a new monitor in the warm room and the addition of an equipment drawer
in the Scope Room. On the Equipment section, I have added a photo of
the D810A camera which has become the primary camera used at the observatory.
The equipment drawer holds all of my optical equipment such as filters
and various lenses for direct viewing not astrophotography. Cameras
are house in a more secure location in the warm room.
May 17, 2018
Now that I am retired from my day job, I finally have
time to post some pictures that I had taken about a year ago. I posted
in my blog about the Elephant Trunk Nebula, but I never put the full
picture in the gallery. It is in the nebula section captioned IC 1396
Elephant Trunk date October 2, 2016. I really like this picture as it
shows a wide view of interstellar gas and of course the "Elephant
Trunk". This picture as with any new pictures I place in the Gallery
can be shared on Face Book by clicking on the share link below the photo.
April 12, 2018
I recently received an Email recommending that I place
somewhere on my web site an article titled: "Astronomy: Computer
Software Games for Kids". I went to the web page and tried several
of the "Free" games which gives "Budding Astronomers"
insights into the Universe through simple computer games. I have added
the link to this site under the "friendly
links" section of my web page which shows up at the bottom
of each page. It is item 8 on the list. I hope you enjoy the educational
games that are provided.
March 27, 2018
I can't believe it has been three months since I last
updated this web page. I have not taken many pictures, but I have had
a couple of groups over to view the heavens. The winter sky is beautiful
and we were able to see Orion, Andromeda, M3 Globular Cluster, Pleiades
and the Moon. It was an enjoyable evening.
Also, I purchased a new computer for the Observatory.
Since this computer runs my cameras, and does all of my Astrophotography
post processing, I purchased an HP Desktop with 16 GB of Ram, and I7
Intel processor, a 3 Terabyte and a 2 Terabyte drive along with 256
MB of flash drive for startup. It is a very fast computer for what I
need it for. I have been loading up all of my required Astronomy Software
so I can get back to photographing the night skies.
December 24, 2017
I have been cleaning up my viewing blog and moved all
of 2016 entries and most of 2017 entries dating back to before October
15, 2017. If you wish to see entries before that date, click on the
link above to go the Astronomical Viewing Blog Archive.
December 20, 2017
Continuing my endeavors of trying out new software, I
recently tried the Demo Version of ImagesPlus. The interface is more
clean than the MaximDL, but both software does the job well when stacking
my Nikon 810A Raw files. I also have been playing with layering in Adobe
Photoshop. I am using the older version of CS2 of Photoshop, but it
is more than adequate for layering pictures. I chose as my subject for
layering the Jewel of the winter sky, the Orion Nebula M 42. I took
the picture using my HyperStar Lens on my 14 inch Celestron Scope and
my D810A Camera. I took two different shots of the nebula for layering
purposes. The first layer is a longer exposure in order to capture the
entire nebula and gas clouds. The problem is when you do this you lose
the center "Trapezium" of the nebula as it is too bright.
The second layer photo was taken with much shorter exposure. I lose
the gas and dust clouds, but I gain resolution of the center trapezium
stars. I then overlaid or layered the two photos to get the final image.
The Images are shown below.
M 42 Orion no Layering
M 42 Layered showing the Trapezium Stars
A larger picture of the layered version is shown in the
Gallery.
November 17, 2017
I have been trying out the Demo Version of Maxim DL so
that I can stack my NEF images from my new D810A Nikon Camera. I have
exclusively been using DeepSkyStacer, but the color was not rendering
properly with that program. I stacked 5 images of the Fireworks galaxy
and the color came through. Compare the image below with the image shown
on the August 27 post on this blog.
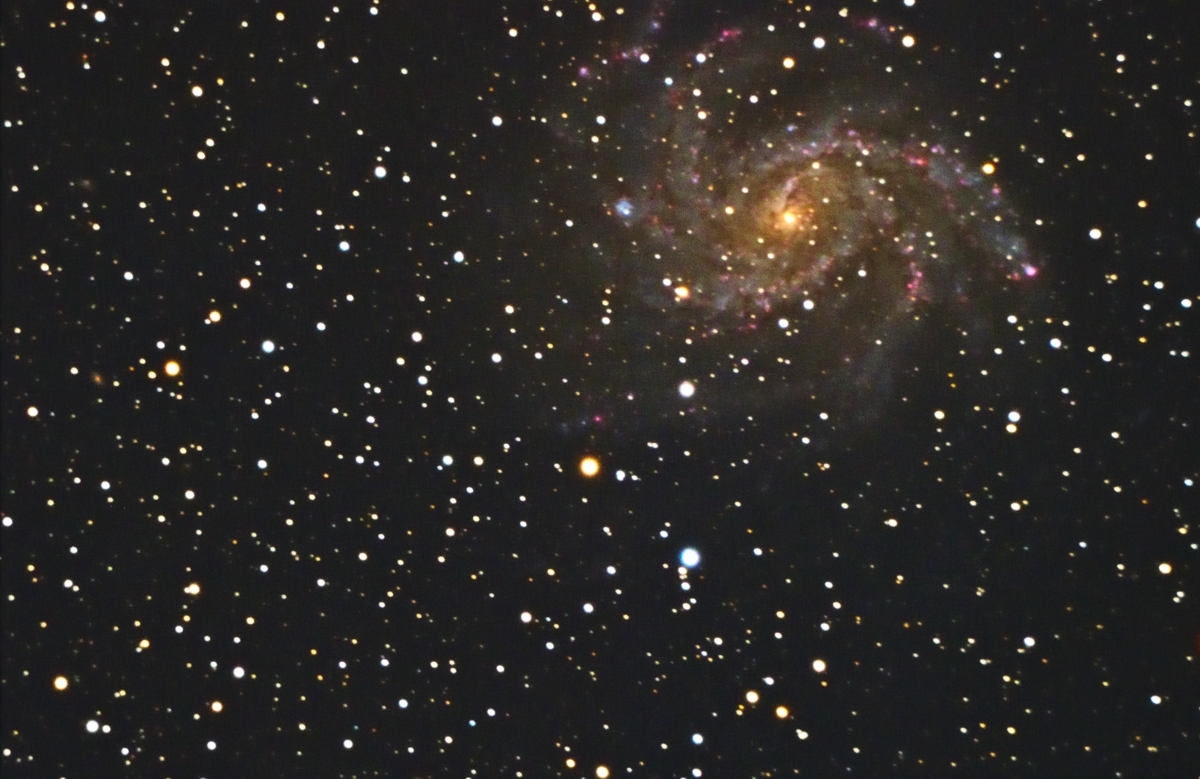
Fireworks Galaxy NGC 6946 Stacked with Maxim DL. Notice
proper color rendering.
November 3, 2017
I made an addition to my "Warm Room". I added
a 32 inch HDTV as a third monitor. This was something that I had in
mind from the inception of the observatory. Its purpose aside from giving
me more viewing space is to give a larger view of photos when I have
people over to the observatory. Now the photos can be seen by everyone
instead of hovering around a couple of computer monitors. I connected
it to my computer as a monitor through a "USB to HDMI/DVI Adapter"
purchased from "Best Buy". The cost of the adapter was around
$40.00 and the Samsung TV was around $300.00. I connected the Adapter
to a USB port and then ran an HDMI cable from the adapter to the TV.
After setting up the Adapter Drivers, the system worked perfectly. A
photo of Before and after is shown below.
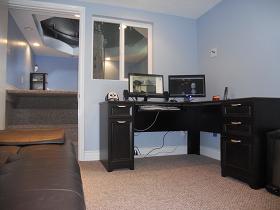 
Before and After
The color of the room is actually rendered like the before
picture. That picture was taken with a Nikon D3 Camera. The one on the
right was taken with my iPhone 7. No mater what people want to say about
cell phone cameras, the D3 rendered a more precise picture.
October 26, 2017
I received an Email today and was given a recommendation
by Peyton Vogel to add
"Home Advisor- Backyard-Astronomy" to my web site. I have
looked over this site and it gives great information on the basics of
astronomy. I have added this to my "Friendly Links" page found
at the bottom of each page. Thanks Peyton for your suggestion.
October 15, 2017
Allot has occurred in the last two months in my personal
life. I have traveled to Scotland and visited that beautiful area of
Great Britain. It was a great vacation and the people were extremely
friendly. I would love to go back and visit again. I enjoyed the vacation
so much, that I decided to retire from my day job and enjoy activities
that I enjoy most, which is spending time with my wife and children
along with my hobby of viewing the cosmos. On October 14, I decided
to use some of my new "Free Time" by taking some pictures
of some of the well known summer nebulas. I took pictures of the Lagoon
Nebula M 8 and the Trifid Nebula M 20. I'm still having problems with
my stacking program DeepSky Stacker. The program stacks the images perfectly,
but the color is not rendered correctly when using my Nikon D810A camera.
In order to get the color rendition of the photos, I was only able to
use one image with no stacking. Even without stacking, the camera produces
incredible pictures.
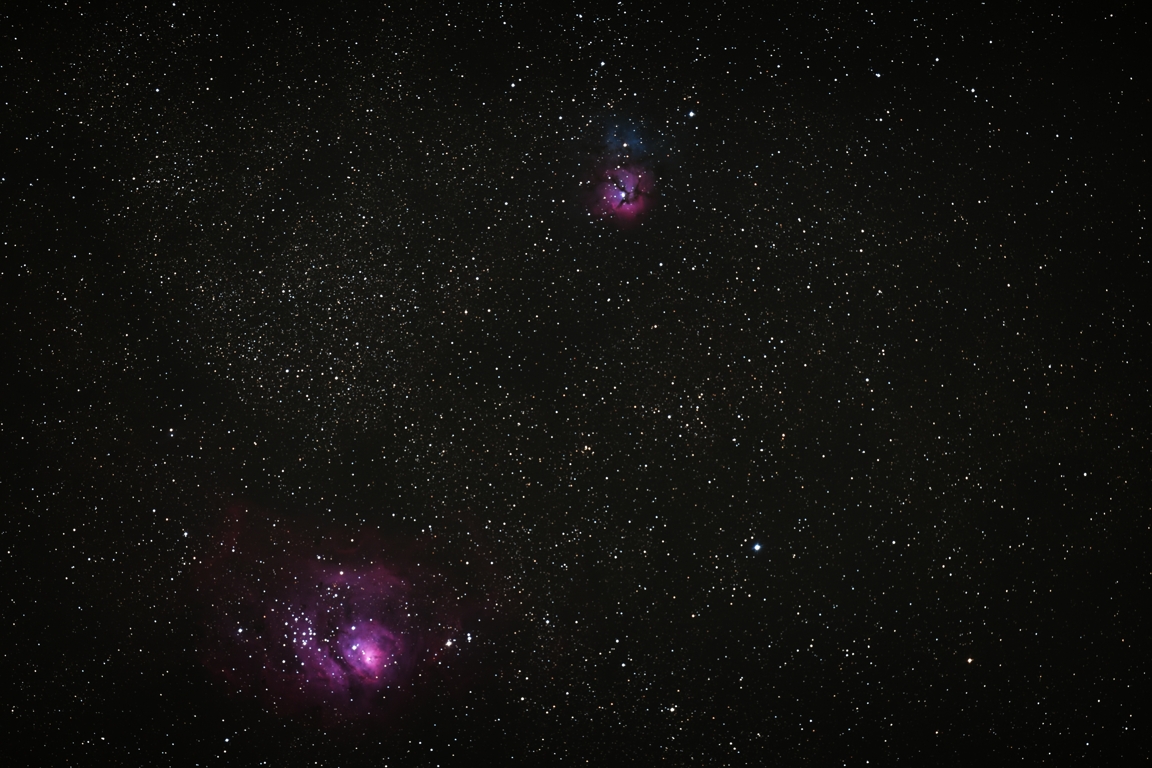
Lagoon (Lower) and Trifid (Upper)
I like the above picture as it shows the relationship
of the two nebulas. This was taken at full frame of the D810A camera
and the HyperStar lens on my CGE 14 inch telescope.
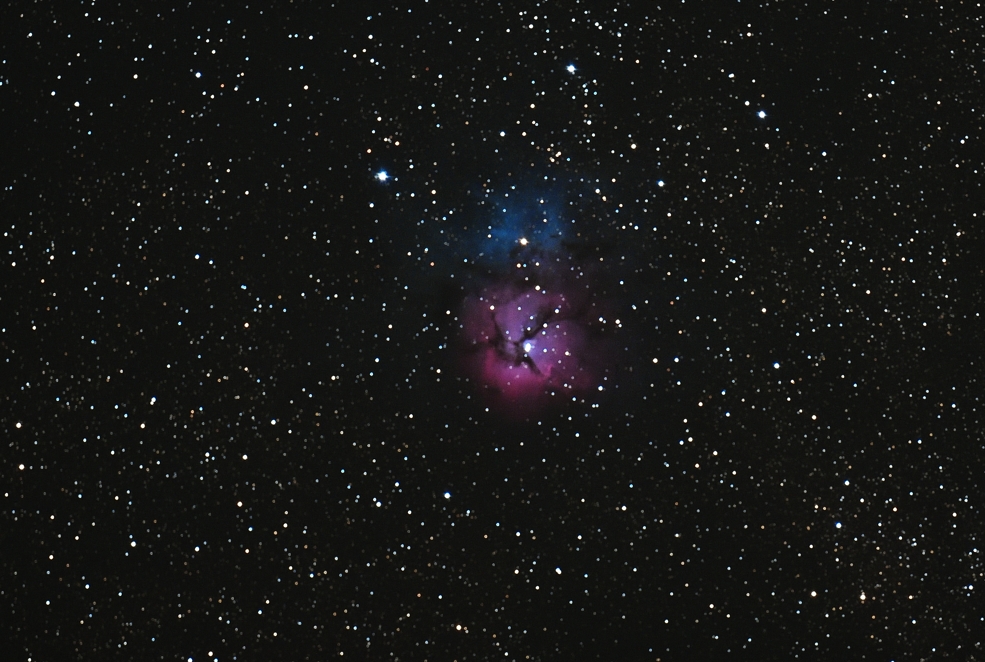
Trifid Nebula (M20)
The above image was taken using the same setup, but the
camera was setup in "DX" mode. This allows the camera to crop
and zoom in on the image using only the camera. It amazes me that this
camera can produce fairly noise free images without using image stacking.
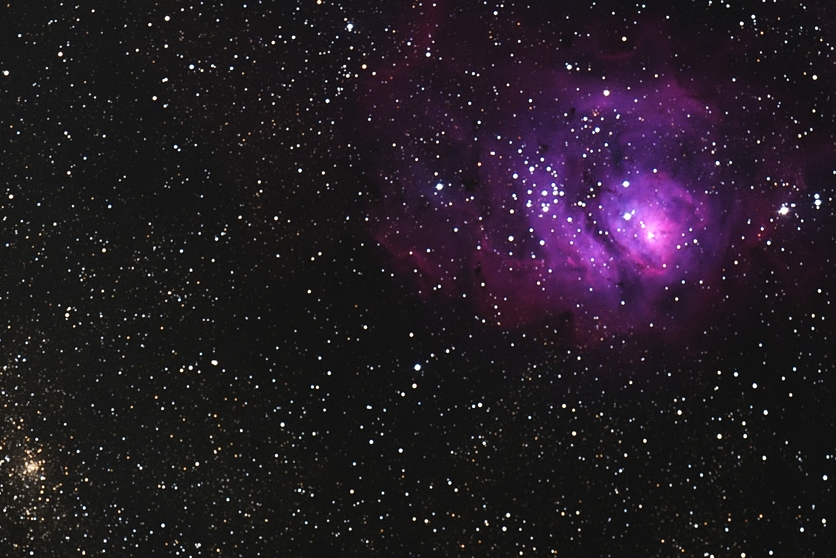
Lagoon Nebula (M8)
|