Go to Astronomical Viewing Blog Archive
Go To the Beginning Post
December 20, 2017
Continuing my endeavors of trying out new software, I
recently tried the Demo Version of ImagesPlus. The interface is more
clean than the MaximDL, but both software does the job well when stacking
my Nikon 810A Raw files. I also have been playing with layering in Adobe
Photoshop. I am using the older version of CS2 of Photoshop, but it
is more than adequate for layering pictures. I chose as my subject for
layering the Jewel of the winter sky, the Orion Nebula M 42. I took
the picture using my HyperStar Lens on my 14 inch Celestron Scope and
my D810A Camera. I took two different shots of the nebula for layering
purposes. The first layer is a longer exposure in order to capture the
entire nebula and gas clouds. The problem is when you do this you lose
the center "Trapezium" of the nebula as it is too bright.
The second layer photo was taken with much shorter exposure. I lose
the gas and dust clouds, but I gain resolution of the center trapezium
stars. I then overlaid or layered the two photos to get the final image.
The Images are shown below.
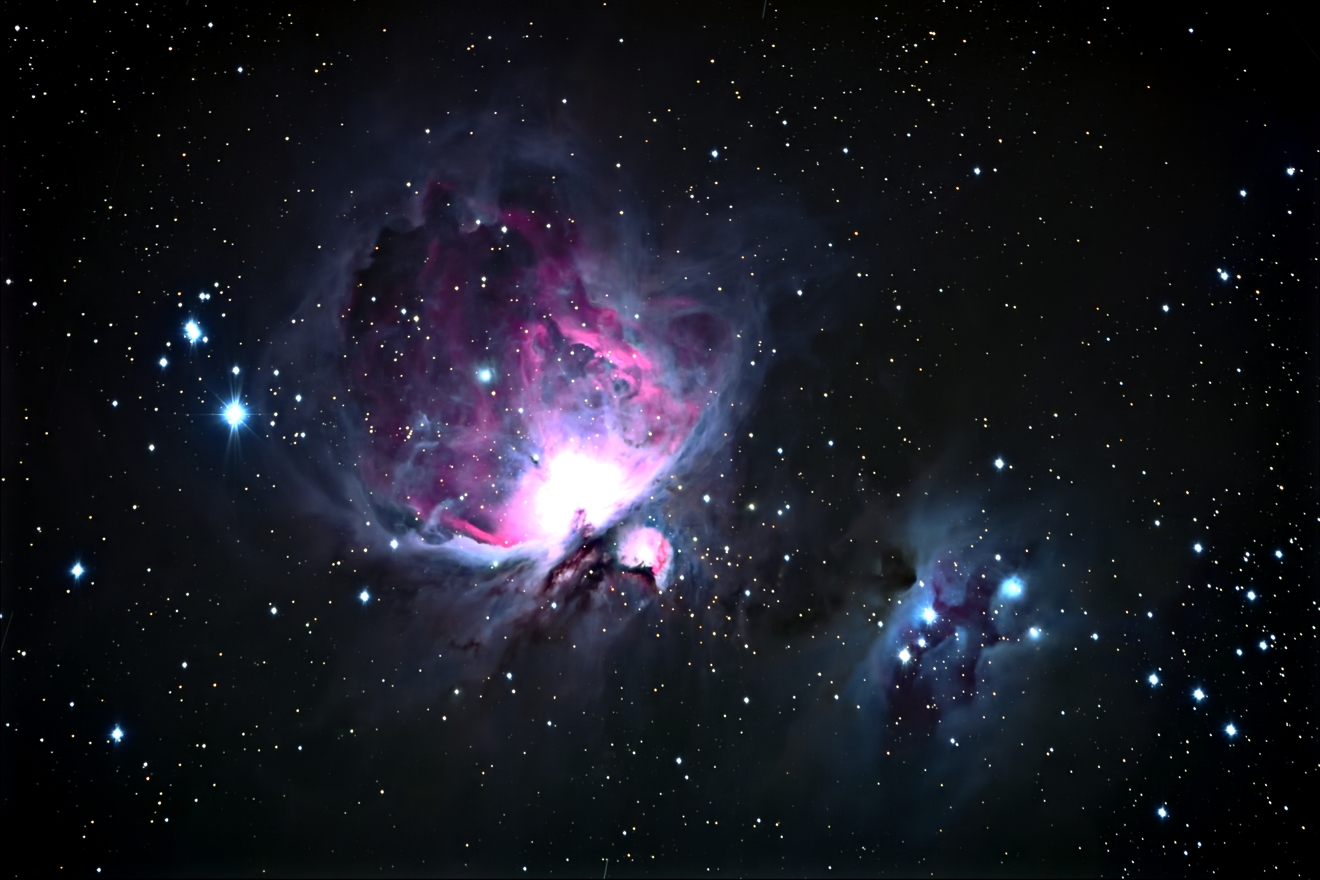
M 42 Orion no Layering
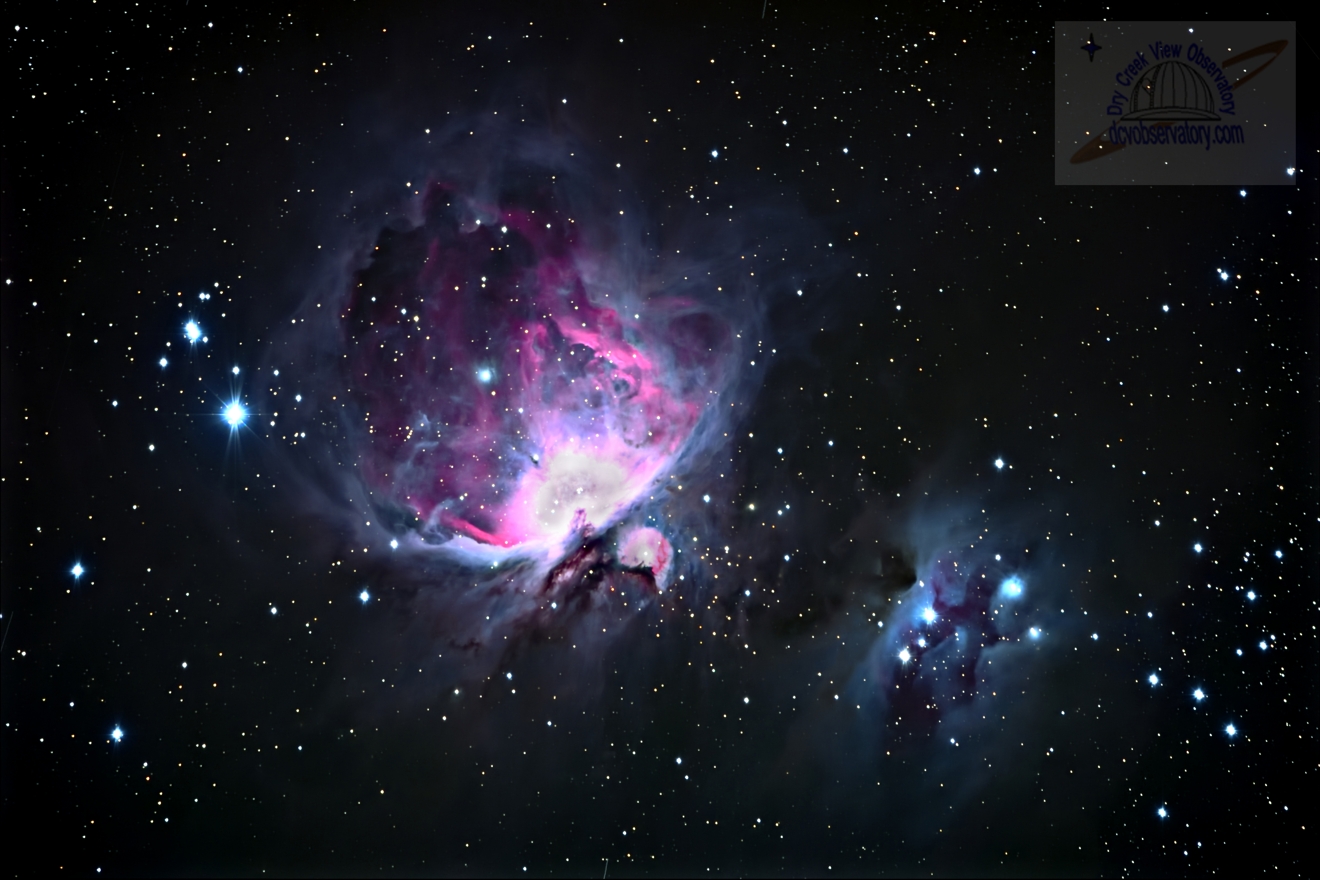
M 42 Layered showing the Trapezium Stars
A larger picture of the layered version is shown in the
Gallery.
November 17, 2017
I have been trying out the Demo Version of Maxim DL so
that I can stack my NEF images from my new D810A Nikon Camera. I have
exclusively been using DeepSkyStacer, but the color was not rendering
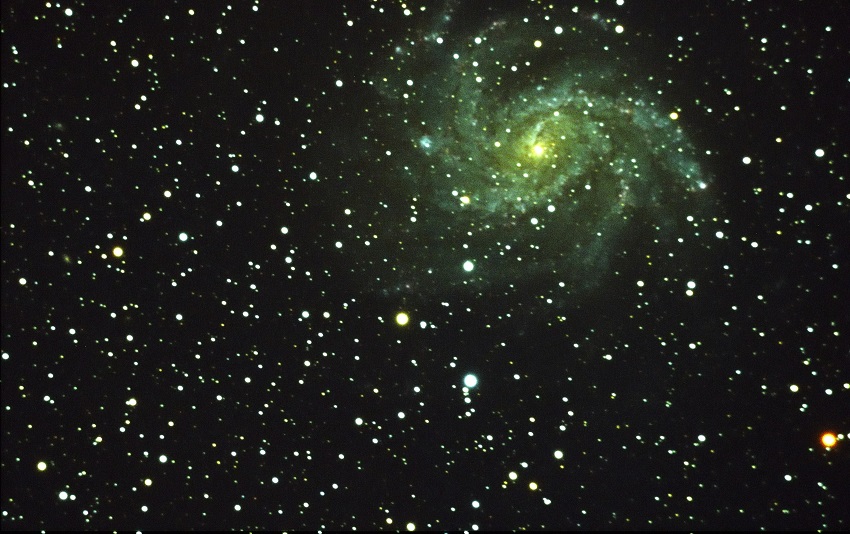
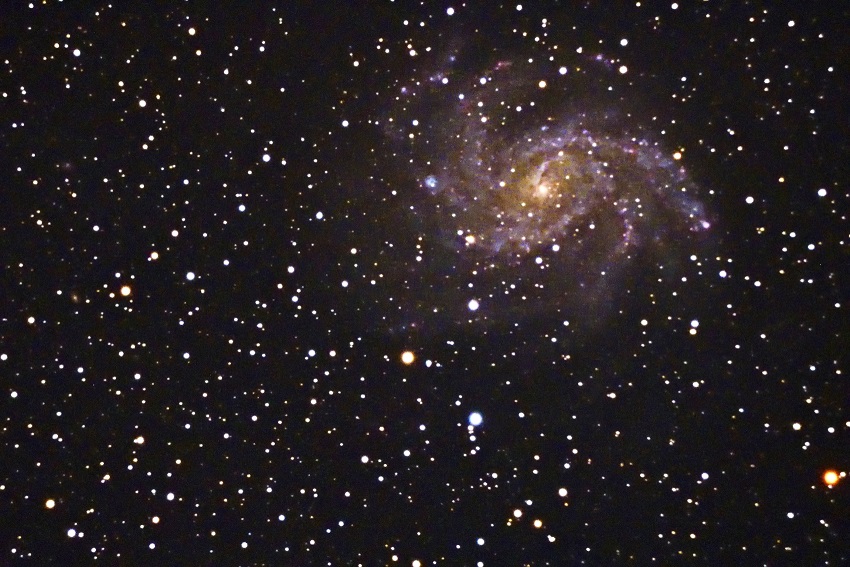
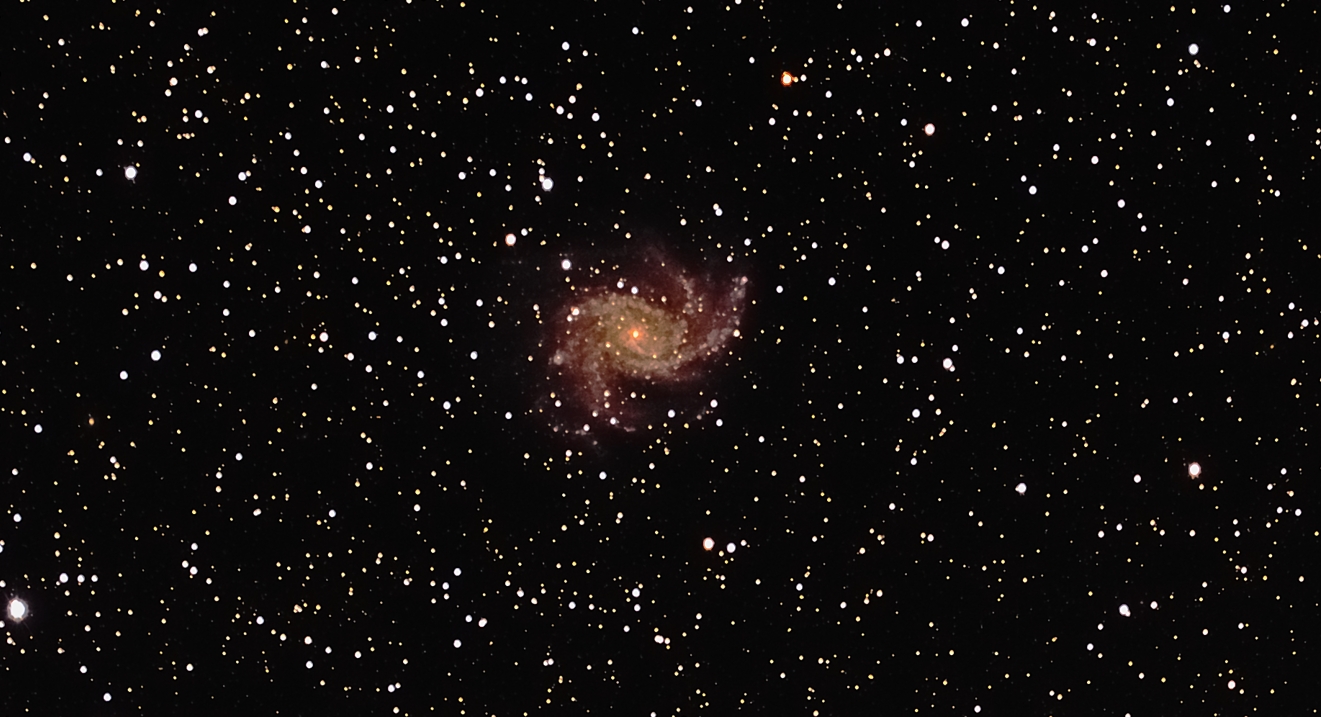
properly with that program. I stacked 5 images of the Fireworks galaxy
and the color came through. Compare the image below with the image shown
on the August 27 post on this blog.
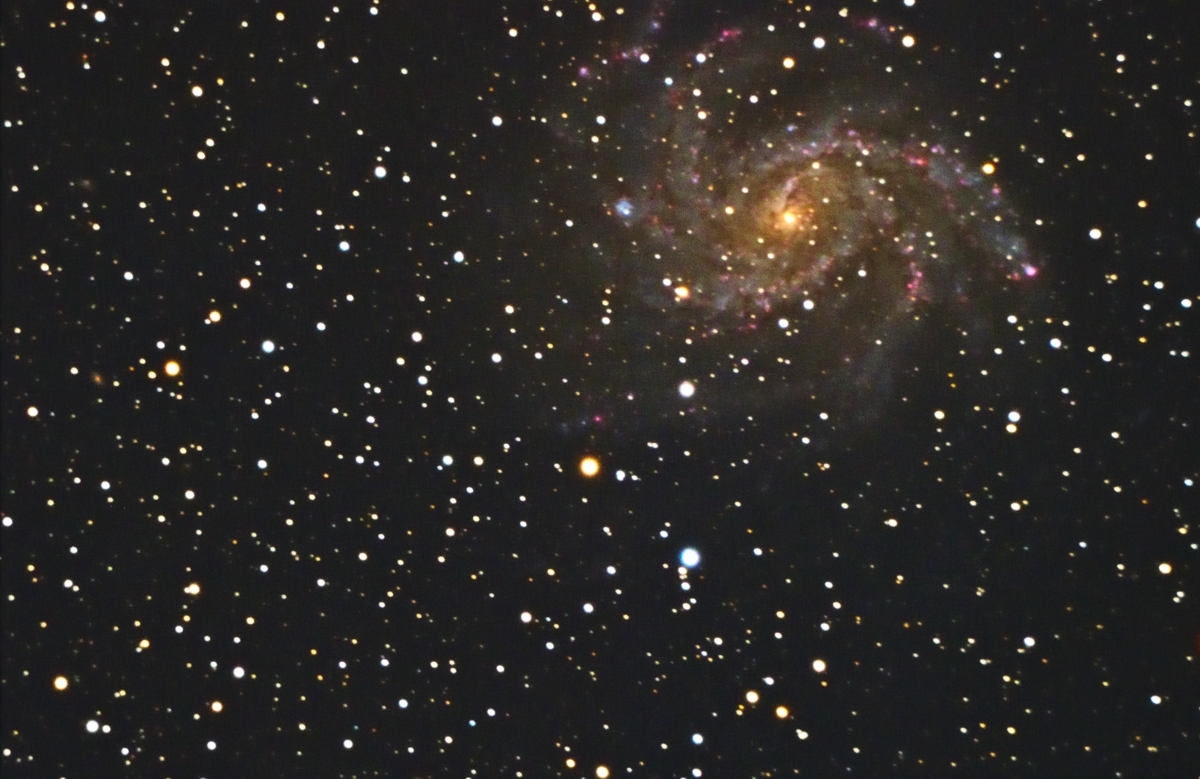
Fireworks Galaxy NGC 6946 Stacked with Maxim DL. Notice
proper color rendering.
November 3, 2017
I made an addition to my "Warm Room". I added
a 32 inch HDTV as a third monitor. This was something that I had in
mind from the inception of the observatory. Its purpose aside from giving
me more viewing space is to give a larger view of photos when I have
people over to the observatory. Now the photos can be seen by everyone
instead of hovering around a couple of computer monitors. I connected
it to my computer as a monitor through a "USB to HDMI/DVI Adapter"
purchased from "Best Buy". The cost of the adapter was around
$40.00 and the Samsung TV was around $300.00. I connected the Adapter
to a USB port and then ran an HDMI cable from the adapter to the TV.
After setting up the Adapter Drivers, the system worked perfectly. A
photo of Before and after is shown below.
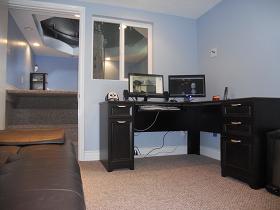 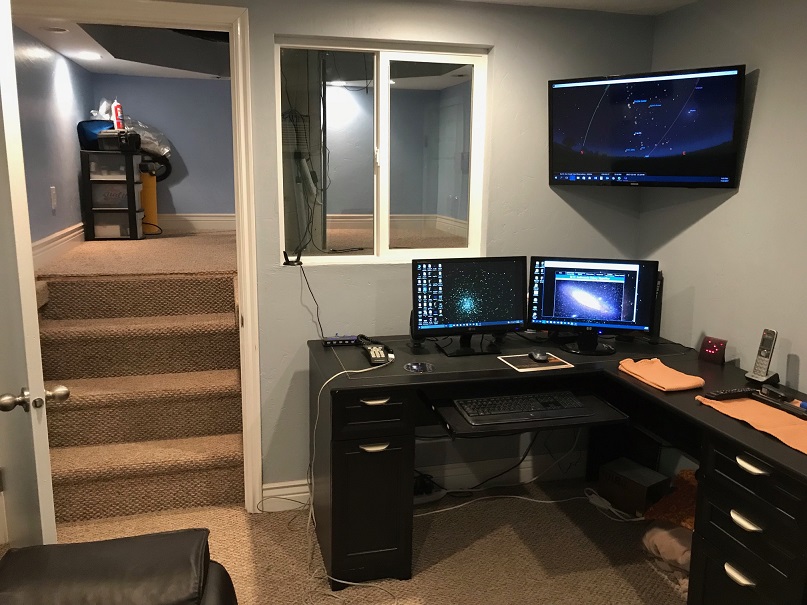
Before and After
The color of the room is actually rendered like the before
picture. That picture was taken with a Nikon D3 Camera. The one on the
right was taken with my iPhone 7. No mater what people want to say about
cell phone cameras, the D3 rendered a more precise picture.
October 26, 2017
I received an Email today and was given a recommendation
by Peyton Vogel to add
"Home Advisor- Backyard-Astronomy" to my web site. I have
looked over this site and it gives great information on the basics of
astronomy. I have added this to my "Friendly Links" page found
at the bottom of each page. Thanks Peyton for your suggestion.
October 15, 2017
Allot has occurred in the last two months in my personal
life. I have traveled to Scotland and visited that beautiful area of
Great Britain. It was a great vacation and the people were extremely
friendly. I would love to go back and visit again. I enjoyed the vacation
so much, that I decided to retire from my day job and enjoy activities
that I enjoy most, which is spending time with my wife and children
along with my hobby of viewing the cosmos. On October 14, I decided
to use some of my new "Free Time" by taking some pictures
of some of the well known summer nebulas. I took pictures of the Lagoon
Nebula M 8 and the Trifid Nebula M 20. I'm still having problems with
my stacking program DeepSky Stacker. The program stacks the images perfectly,
but the color is not rendered correctly when using my Nikon D810A camera.
In order to get the color rendition of the photos, I was only able to
use one image with no stacking. Even without stacking, the camera produces
incredible pictures.
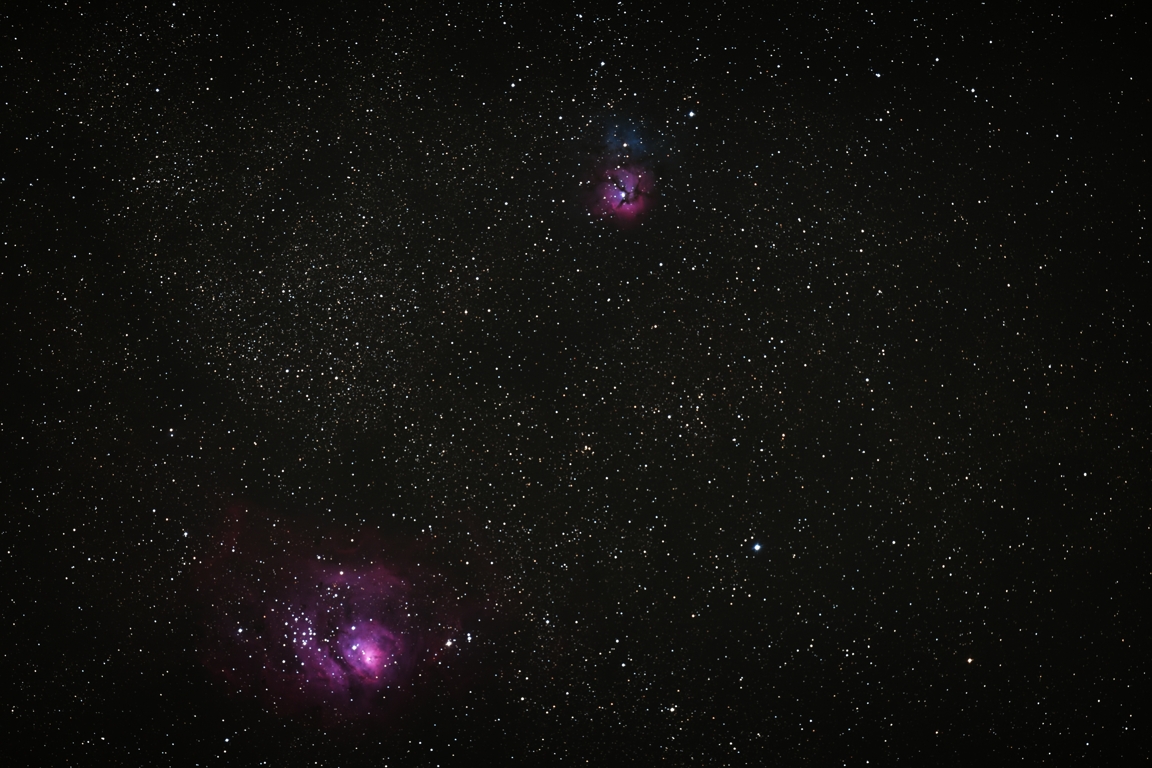
Lagoon (Lower) and Trifid (Upper)
I like the above picture as it shows the relationship
of the two nebulas. This was taken at full frame of the D810A camera
and the HyperStar lens on my CGE 14 inch telescope.
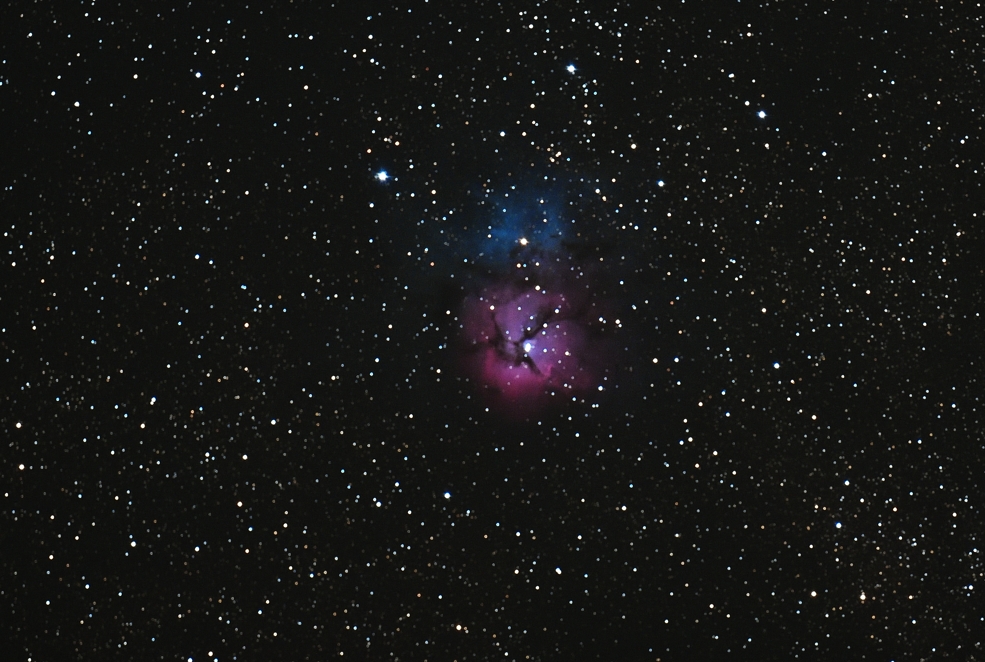
Trifid Nebula (M20)
The above image was taken using the same setup, but the
camera was setup in "DX" mode. This allows the camera to crop
and zoom in on the image using only the camera. It amazes me that this
camera can produce fairly noise free images without using image stacking.
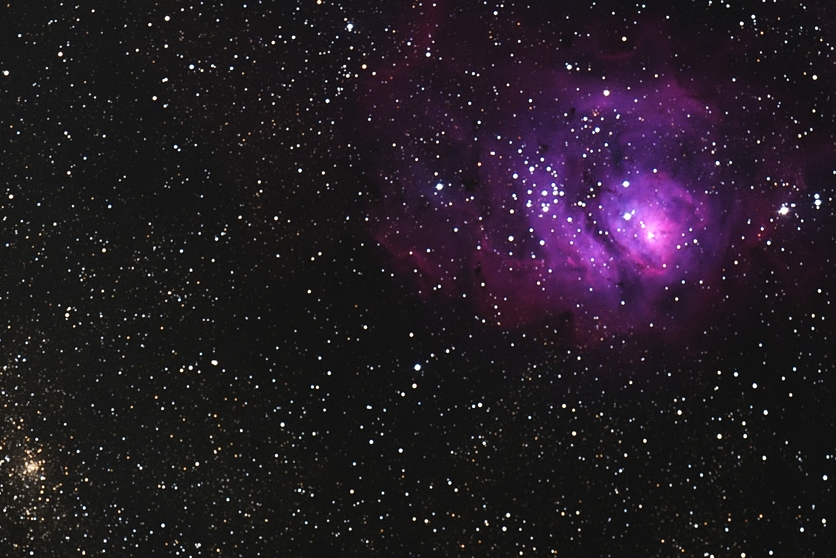
Lagoon Nebula (M8)
The Lagoon nebula shown above was also taken using the
DX mode on the camera. The cluster in the lower left of the photo is
NGC 6530.
August 27, 2017
I had a fun night on August 24, taking pictures this weekend.
I finely got a chance to give my Nikon D810A a work out at f/11. I took
some pictures of NGC 6946 (Fireworks Galaxy) and M 3 Globular Cluster.
I ran into some problems with stacking the Fireworks Galaxy with Deep
Sky Stacker. The problem turned out to be "Not Round" stars
therefore DSS had a hard time getting a reference. I did a "Polar
Alignment" and found that the scope was not properly aligned. Once
the alignment was complete, the stacking worked just fine with the exception
of the Color rendition. For some reason the color was lacking and when
I tried to bring out the color, I was only able to get a green Hue.
The picture clarity was great and the stars were round but I still have
not solved the color problem. I may need to try a different stacking
program when I use the 810a camera. The individual pictures has great
color. Only after stacking did I loose the color. Below I have a photo
of M3 a Globular Cluster. This is a single shot and due to the brightness,
stacking was not necessary.
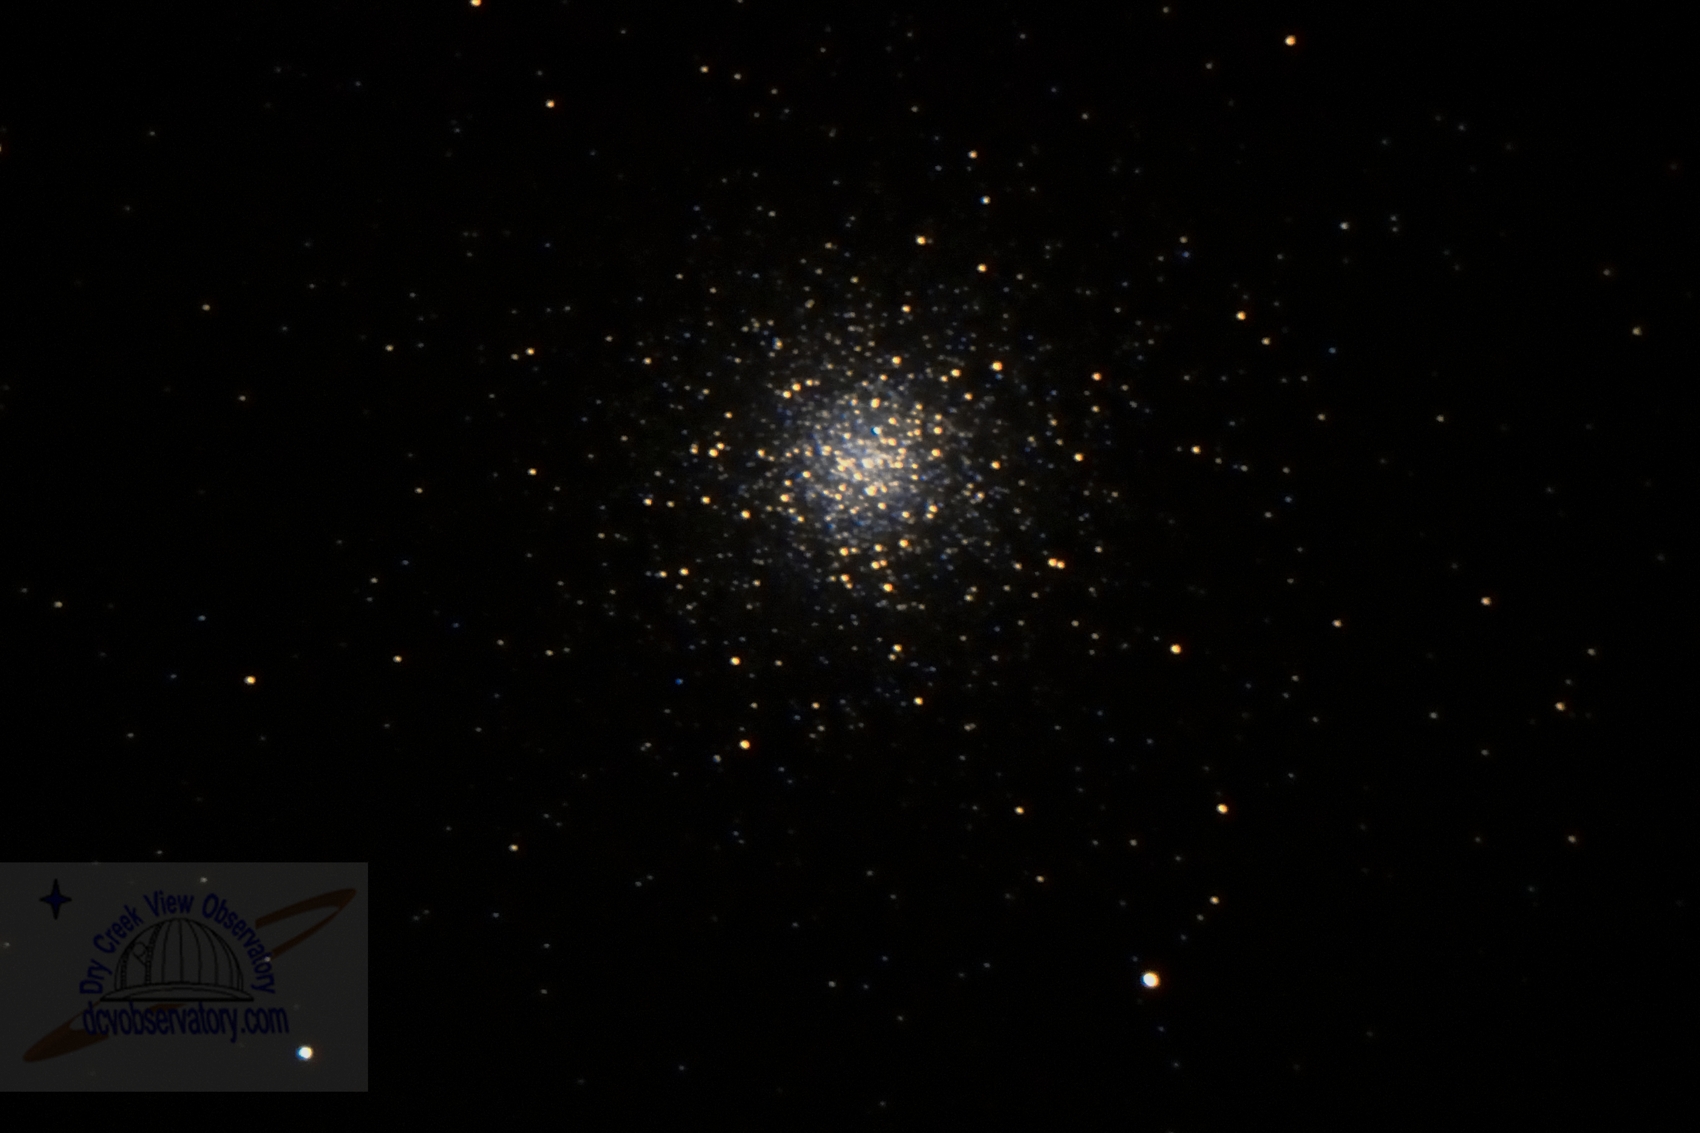
M 3
Comparison of Fireworks Galaxy between 5 stacked images
and 1 image. The single image is the true color. The 5 stack has a green
hue but shows more detail.
Fireworks Galaxy 5 Stack
Fireworks Single Stack True Color
August 11, 2017
This has been a crazy summer for me. the last blog posting
was over 4 month ago. No I haven't lost my love of astronomy, it is
just the weather here has not been cooperative. Since I need to get
up at 4;55 AM for my day job, I cannot stay up late at night and take
pictures on the evenings I must get up for work. That leaves Thursdays,
Fridays, and Saturdays to take pictures. Then there must not be a full
moon and the skies must be clear. Needless to say, my window of picture
taking opportunity is limited. I have not had any clear days using the
criteria above to take pictures. I did have one night where I did "Scope
Maintenance" by Polar Aligning my scope and doing a GO TO alignment.
I have also been doing some visual star gazing. But my love of picture
taking (Which Takes Time) has been nonexistent.
April 9, 2017
I haven't forgotten my Astrophotography hobby, it has
just been bad weather on the nights that I can take pictures. I finally
got a chance to use the new camera on M 106 Galaxy. Using my new Nikon
D810a camera I was able to take the following picture:
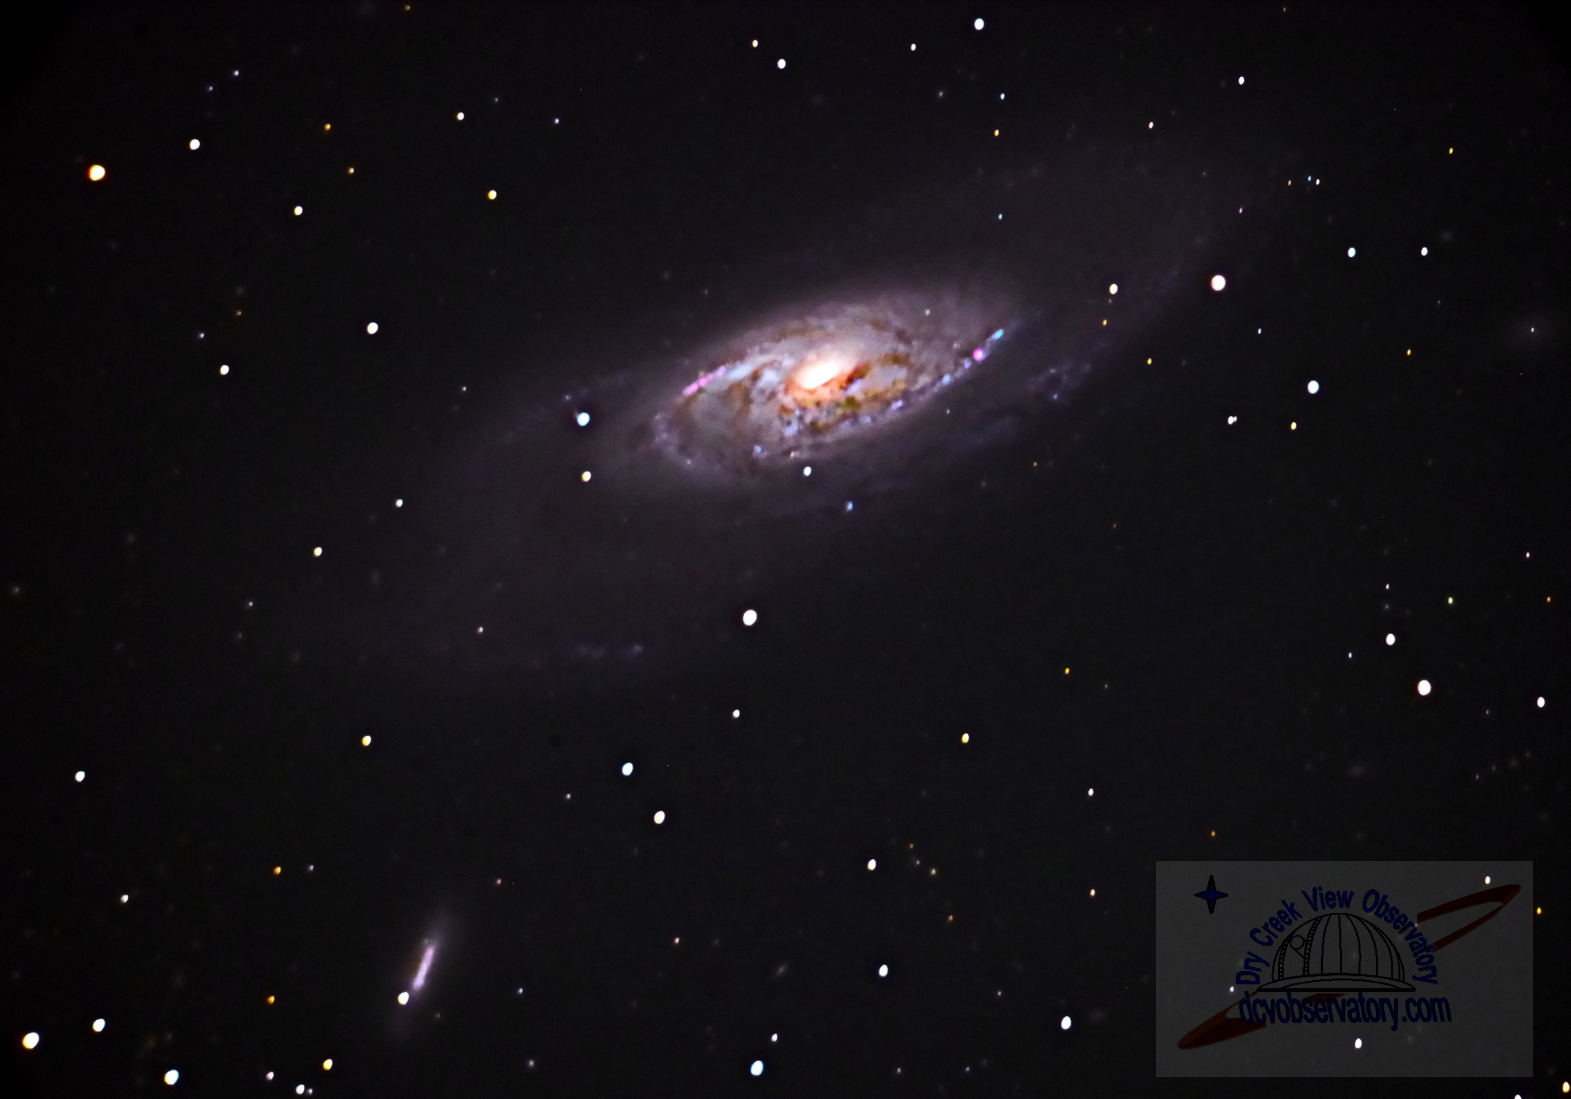
M 106
The picture above was taken at f/11 through my 14 inch
Celestron Scope. The shutter speed was 12.5 minutes at ISO 5000. I took
several pictures at these settings, but for some reason, my Deep Sky
Stacker program would not stack the pictures so this is a single shot.
I will continue to work with the stacking program to get it to stack.
Even though this is a single shot, I am pleased with the performance
of the camera. Hopefully I can get more stacked pictures and a slightly
sharper image. If I am able to do this I will post the image in my gallery.
January 17, 2017
Tonight I was privileged to do a little "Outreach"
to a local youth group from Leamington Utah. There were 17 young men
and their leaders who came to the observatory do do a little stargazing.
With a group that large, it was cramped in the warm room which is only
12x10 feet in area. I welcomed them and took 6 boys and their leaders
one group at at time into the scope room. The others stayed in the warm
room with my son Brent showing them how we take pictures and how we
find our targets for a photo session. He kept them busy while I showed
those in the scope room some of the better known object. It was cold
outside at 18 degrees Fahrenheit, but the warm room was a comfortable
72 degrees. With a group of that size, we focused on 4 objects. The
moon was not up so we looked at the following objects.
Venus
Andromeda Galaxy
Pleiades Cluster
Orion Nebula
All in all it was a good group session.
January 7, 2017
Wow, since I haven't updated this blog since the Thanksgiving
holidays, I wish everyone a delayed "Merry Christmas and Happy
New Year". I have actually had fun over the Christmas and New Years
holidays. My wife bought me a new "Nikon D810a camera for my observatory.
Since I am a Nikon man and use DSLR cameras for my observatory, I have
been coveting this camera since Nikon introduced it. The problem is,
it is an expensive camera ($3700) and its primary use is for Astrophotography.
I have seen several astrophotos from this camera and have read some
reviews. Some say it is not worth the extra cost for a camera that will
give a slight "Red" tint in the pictures if used for terrestrial
photography such as scenery or on People. Well that is not my primary
use for the camera so that was not an argument for not purchasing it.
Other reviews say that it is the best "DSLR" camera on the
market for Astrophotography. I cannot objectively say it is the best
DSLR for space pictures since I have not tried other cameras to make
a comparison. What I can say is that it is amazing and specifically
tuned to allow Hydrogen Alpha (HA) light frequencies and not filter
them out like most DSLR cameras. I have a modified Nikon D5200 camera
that won't filter out the HA frequencies, but it cannot hold up against
the D810a.
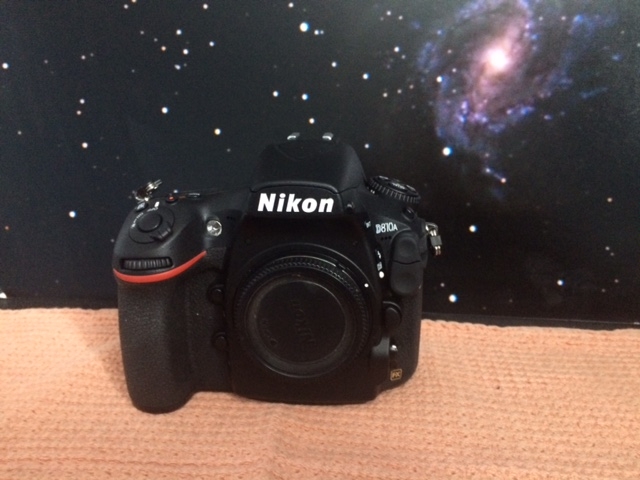
Nikon D810a
Features of the camera which are different from the "Nikon
D810" (Notice no "a") include long duration exposure
times natively to the camera. I can set shutter times between 4 seconds
and 900 seconds (15 Minutes) without special timers connected to the
camera. I can also use the "Bulb" setting for longer durations.
One problem with this feature is that it resides on the camera. To use
this feature you must set it from the menus "on" the camera.
Since I use remote software and control the camera from my computer
when it is connected to my scope, I cannot access this feature without
actually setting it from the camera. This is not a problem for fixed
cameras to a scope in an observatory connected to a computer because
I do have access to the "Bulb" function, shutter speed and
also ISO settings from the computer. I can also access the "Live
View" and "Movie" functions when connected to the camera
from a computer.
An amazing feature of the camera is the ISO Sensitivity.
Natively the camera can have settings between ISO 200 and ISO 12800.
I can however access the ISO settings to 1 step below 200 which gives
me the capability of shooting at ISO 100. I can also access settings
to 2 steps above ISO 12800 which gives me a whapping 51,200 ISO!! Granted,
at that setting there is allot of noise. But it does help with "Framing"
the galaxy or nebula without needing long exposures to do so. Once the
object is framed, the ISO is reduced and time extended to get the picture
I want.
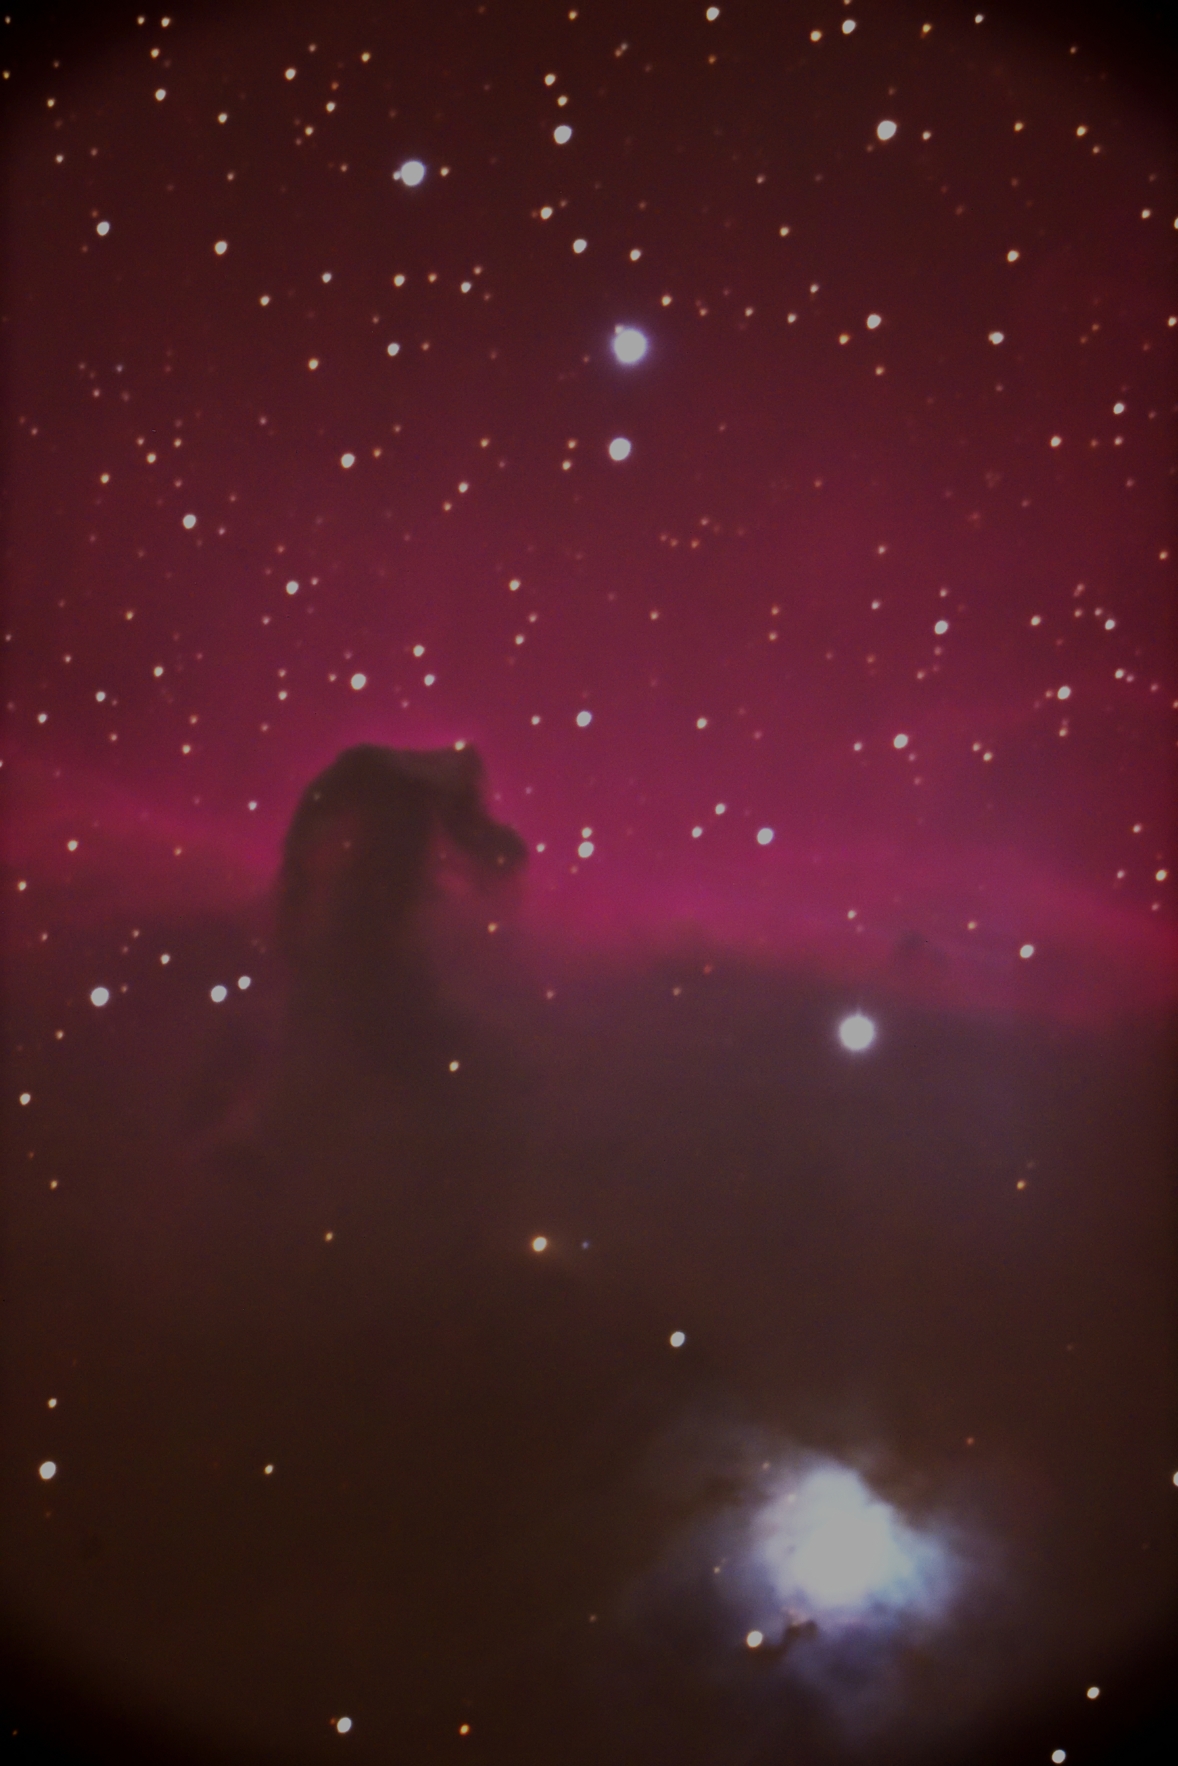
Below are two pictures I took of the Horsehead Nebula
through my scope at f/11. One at 3200 ISO with a shutter of 8 Minutes,
and one at 12800 ISO with a shutter of 3 minutes. These are single shots
with very little post processing.
 ------
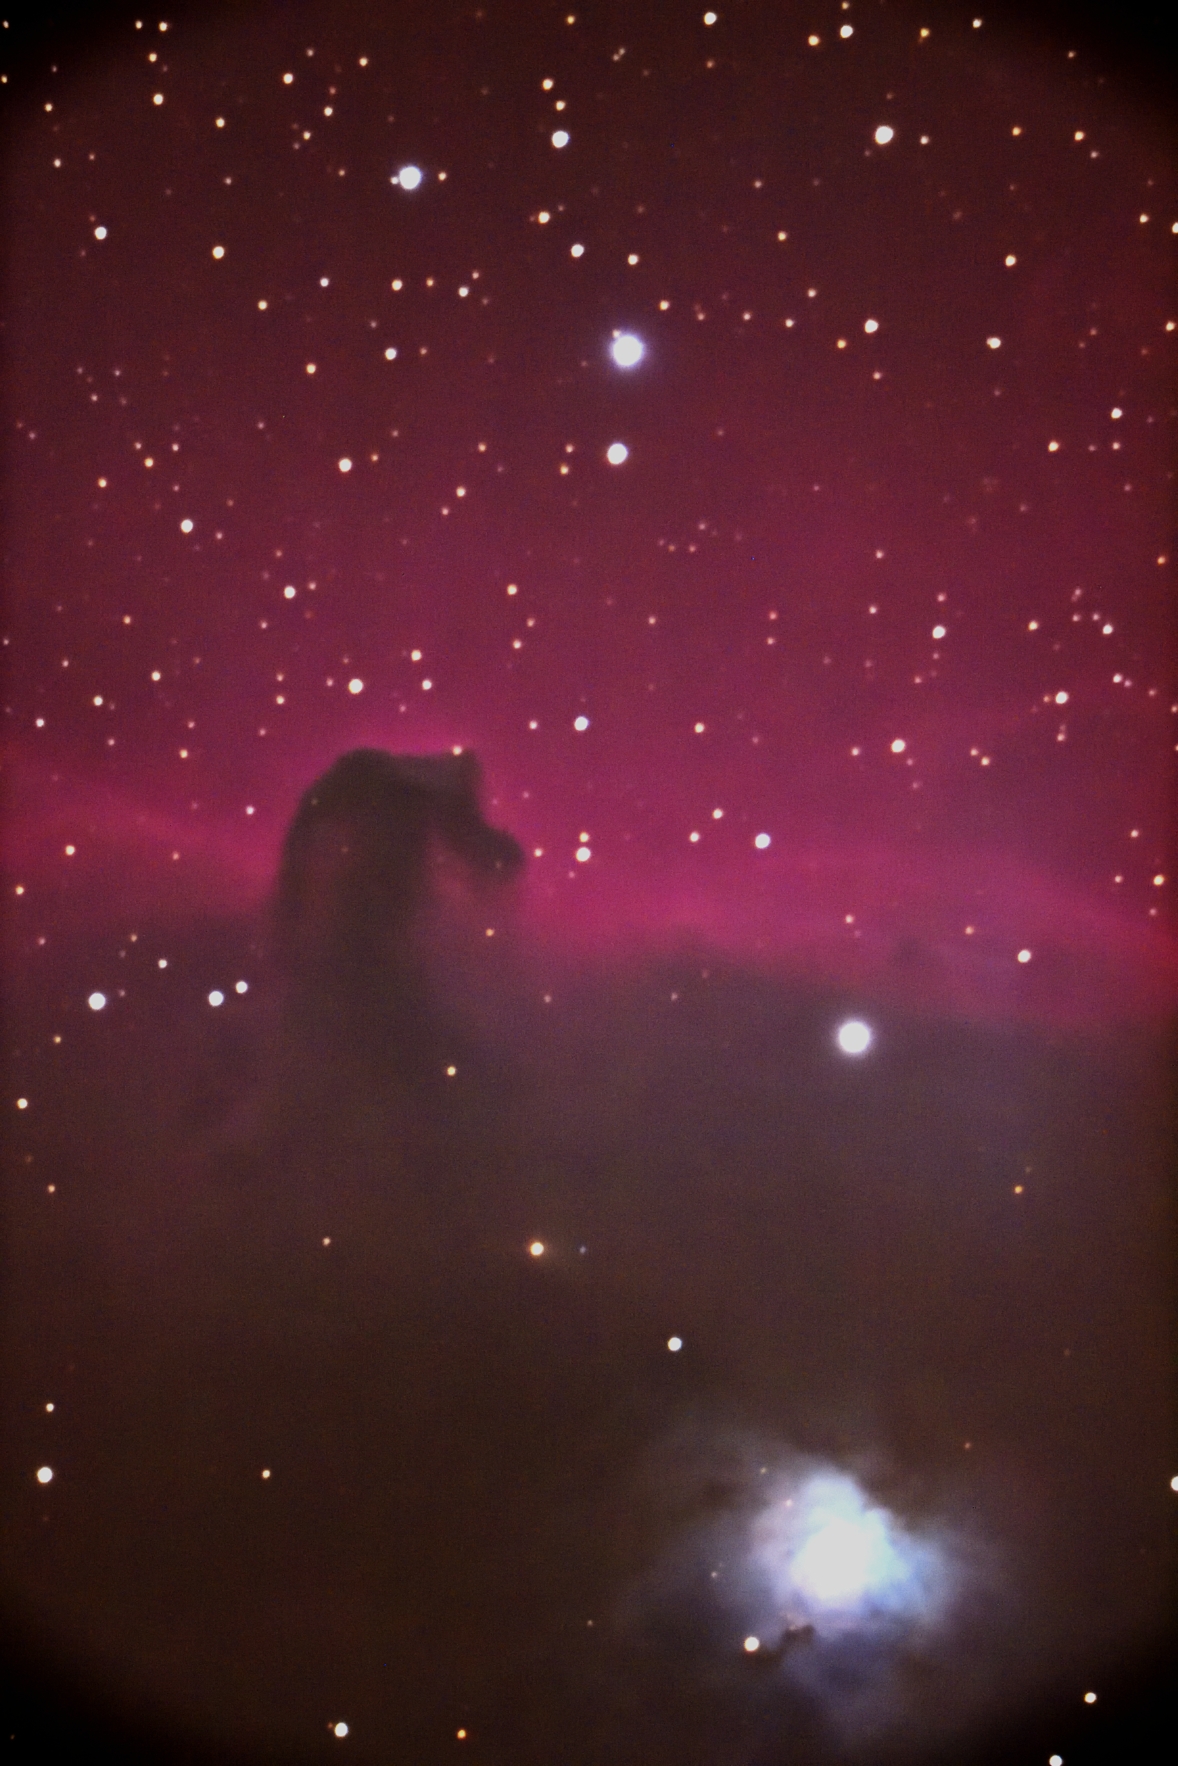
Horsehead ISO 3200 shutter 8 Minutes
-----------------Horsehead ISO
12800 shutter 3 minutes
The photo on the right is slightly more "grainy"
or has more noise than the one on the left. However, the shutter time
is less than half of that on the right. The noise can be taken care
of with using "Stacking". It amazes me that the ISO 12800
photo is as clean as it is for only a single shot and no stacking. I
have not posted these in my gallery as I want a "Landscape"
picture at lower ISO values and do some stacking with my "Deep
Sky Stacker" program. They are shown here only for illustration
of the low noise capability of the camera. I think I can get a wonderful
picture of this Deep Sky Object (DSO) with my new D810a Camera. For
me it was worth the extra cost. However, it is still less than "Dedicated
Astrophotography" cameras and I can still take a picture of my
family if I choose to do so.
November 23, 2016
It has been a month since I last updated this blog, but
I haven't been slacking. I have been having problems with my internet
connection to the Observatory and had to change providers. Duuring that
time, I fixed (Hopefully) a roof leak between my warm room and the scope
room. I used alot of roof seal tar and some foam so that I could get
a good slope to the gutters. I hope this solves the problem. It rained
all last week and no sign of leak.
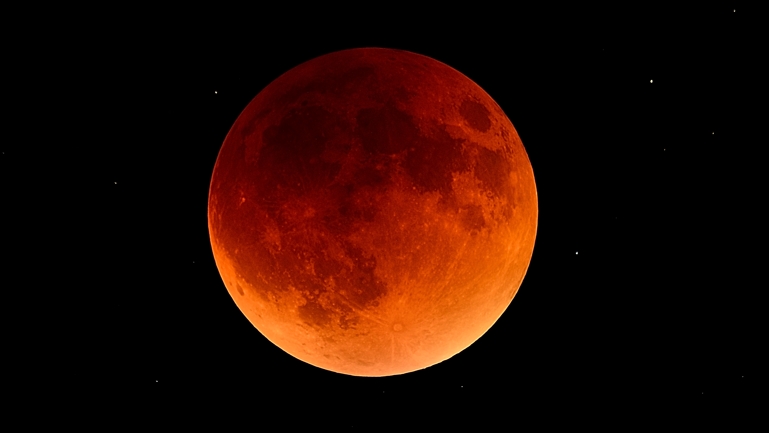
I also took a picture of the "Super Moon" on
November 14. I took it just as the moon was rising over the eastern
mountains of Oak City. I really like how it turned out.
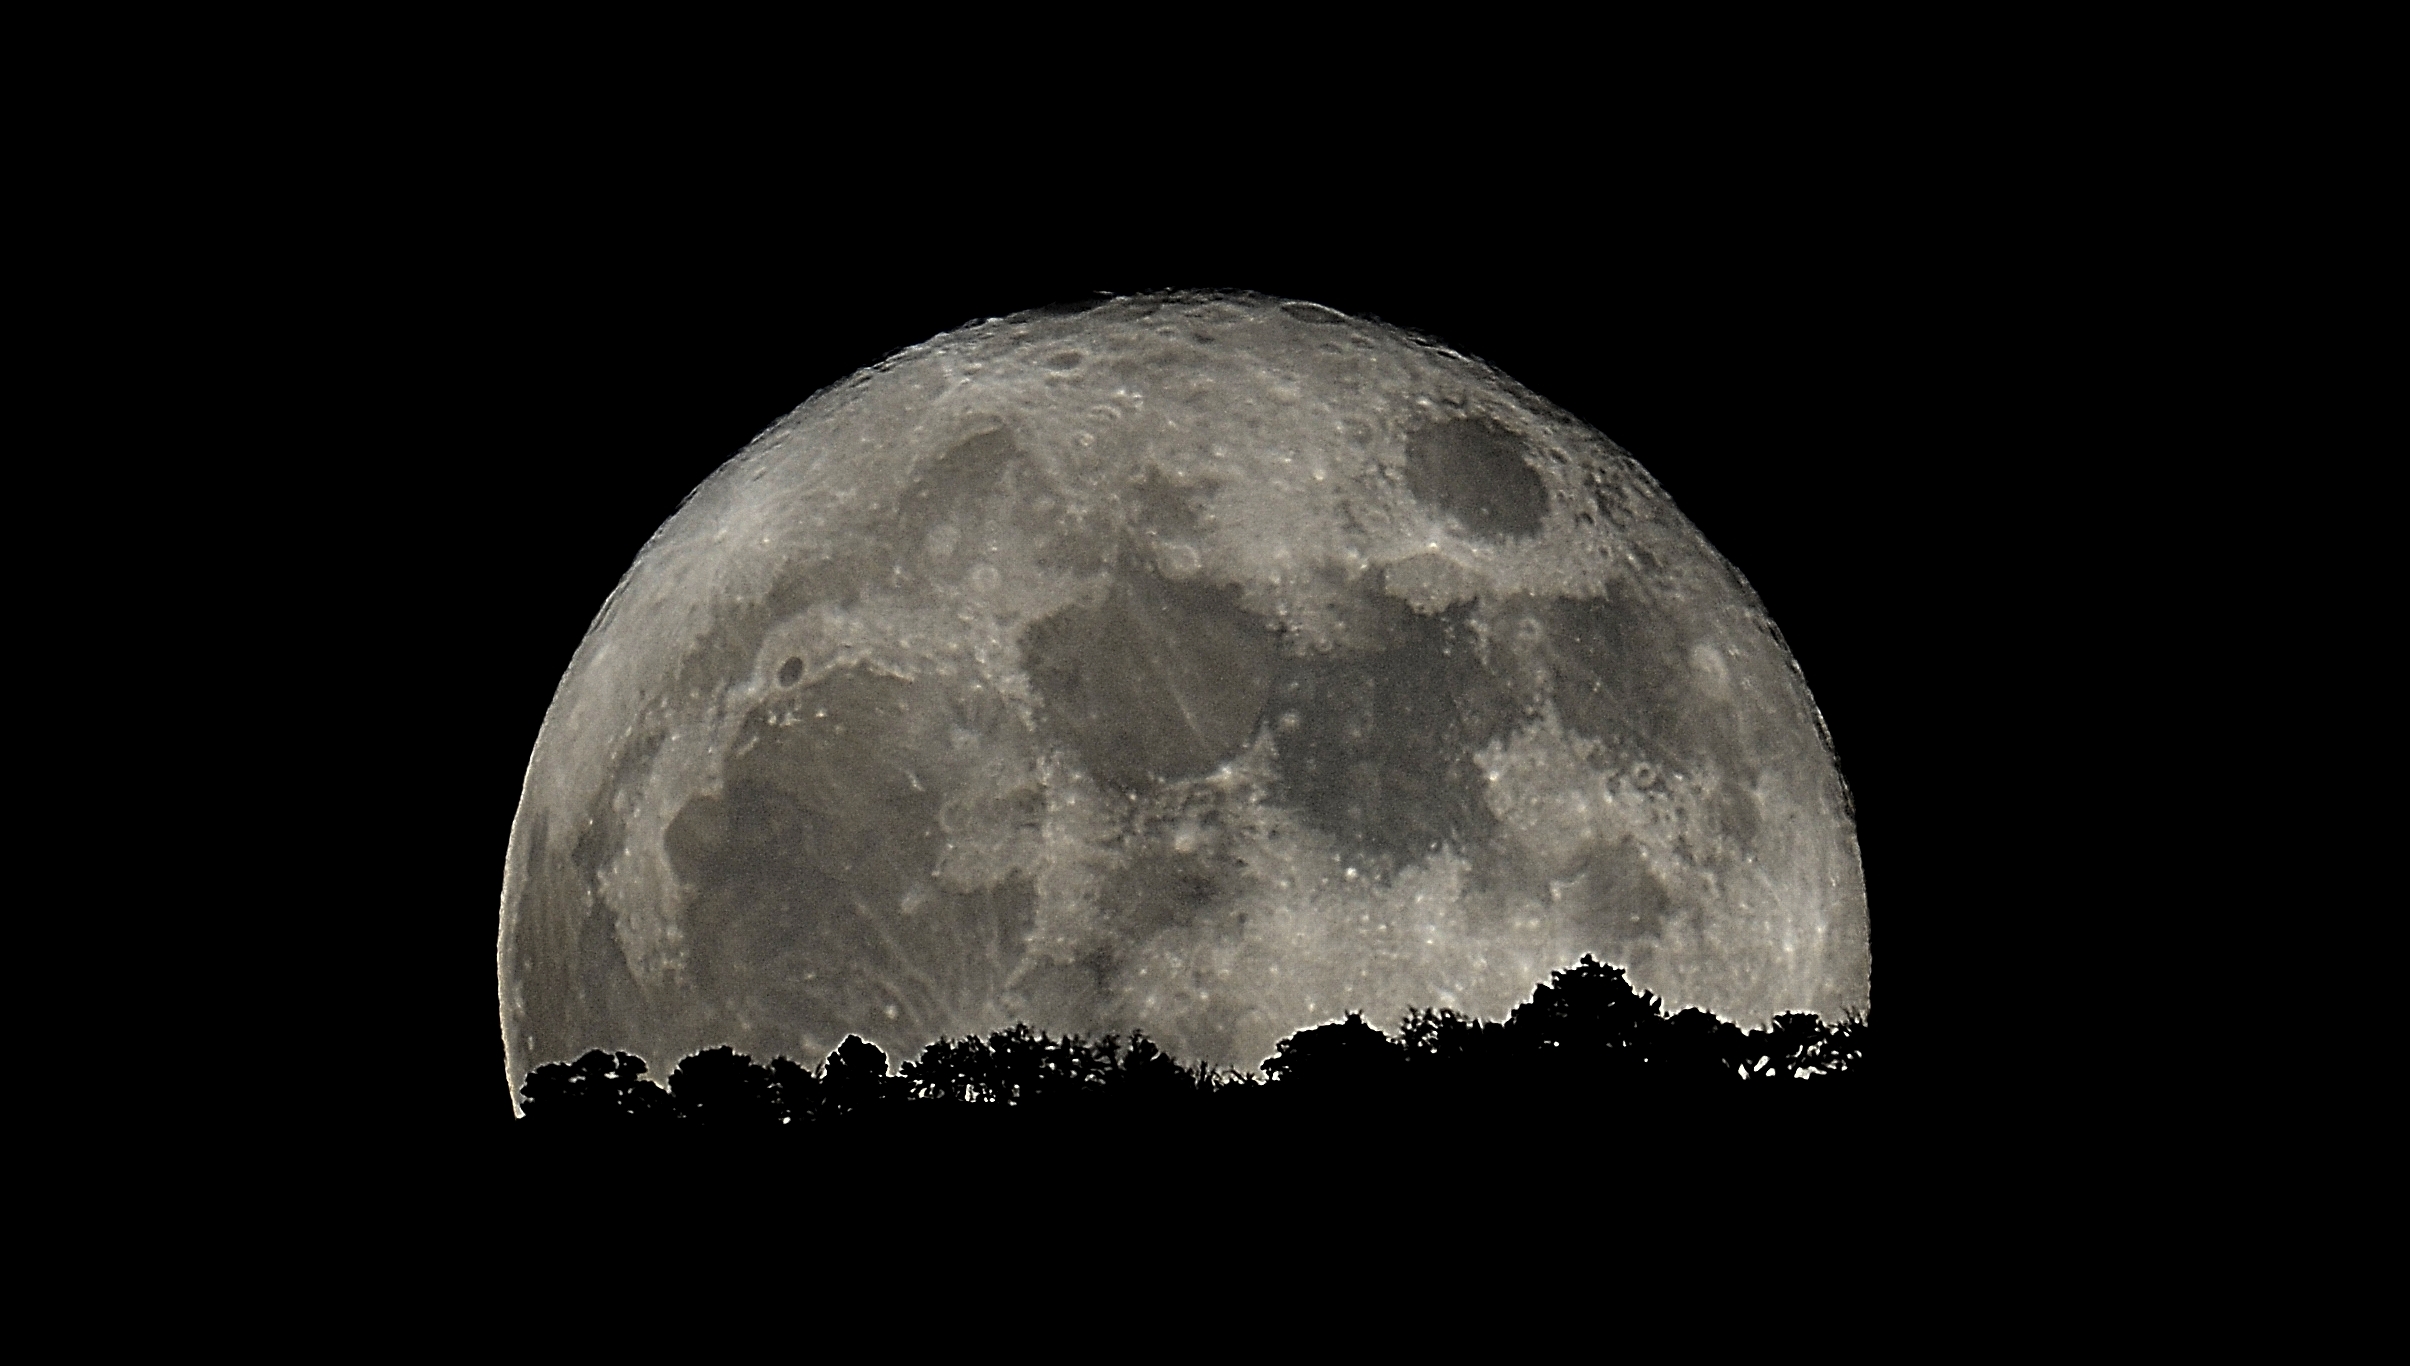
Super Moon (A full image is in the galery)
Octover 23, 2016
Earlier this month, I took a picture of the Elephant Trunk
Nebula (IC 1396) located in the constellation Cepheus. I used my HyperStar
lens to get the wide view of the nebula. Most photos only show the trunk
which is actually IC 1396A. The trunk in my picture is in the 1st quadrant.
The entire picture shows the massive size of the nebula. Since the nebula
is in the dense cross section of our Milky Way Galaxy, you can also
see the million of stars in the fore and background of the picture.
Below is a picture of the nebula.
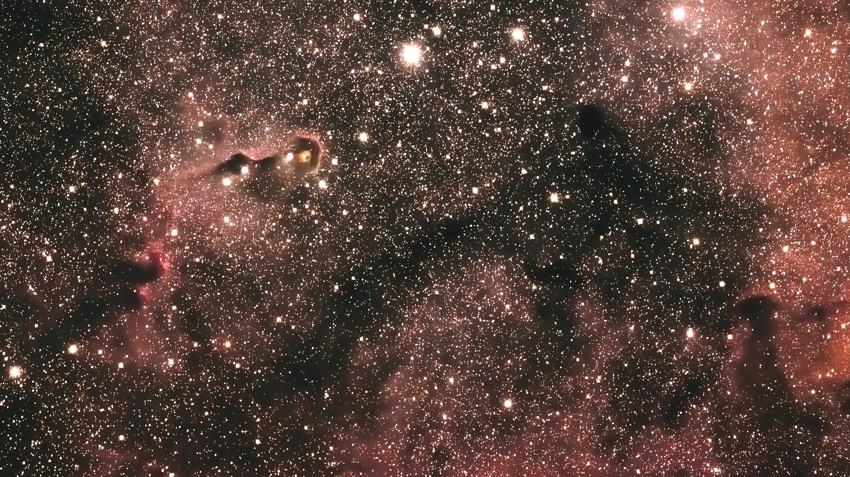
IC 1396 Elephant Trunk Nebula
On a different subject, I have been working on the roof
of my Observatory. Earlier this spring I noticed that a water leak had
formed in the Scope Room on the common wall between the Scope Room and
the Warm Room. This caused the paint to bubble and sheetrock to break.
I will eventually post my repair job in the Observatory section of this
web page. I had flashing between the two rooms, but the water leaked
on the Scope Room side. There was no water that reached any of the equipment
in the Scope Room.
October 7, 2016
Last week, Tom Beck and his wife Barb came to visit the
Dry Creek View Observatory. Tom is interested in building his own observatory
and wanted to see how I took pictures and how my observatory is set
up. I had a good visit and hopefully answered his questions. Tonight,
I borrowed my Son's Nikon D800 camera to see how the sensor in that
camera performs. I am looking at purchasing the D810A which is tuned
specifically for Astrophotography. The sensors in each camera are essentially
the same, but the D810A has a "Tuned" IR filter to allow for
a wider spectrum of light to be captured. I was impressed with the D800.
A picture of the "Firework" Galaxy (NGC 6946) is shown below.
I like how the veins in the galaxy are visible in this picture. A larger
picture of this galaxy is shown in the Astrophotography Gallery.
NGC 6946 Fireworks Galaxy
August 26, 2016
On August 6, 2016, the sky was clear and the Moon was
just starting to show itself in the Western Sky. I decided to do some
close up photography. The image is of Mare Crisium. The magnification
was about 312 X. I got this magnification using my 4X Tele Vue Powermate.
Still shots from my camera were blurry due to the atmospheric distortion.
I took a "Movie" with my camera at 1920x1080 for about 40
seconds. I then processed the image using RegiStax 6 and Nikon Capture
NX2. I think the detail turned out well considering the moon was low
in the Western Sky at the time the picture was taken. A larger image
can be viewed from my gallery under "Solar System"
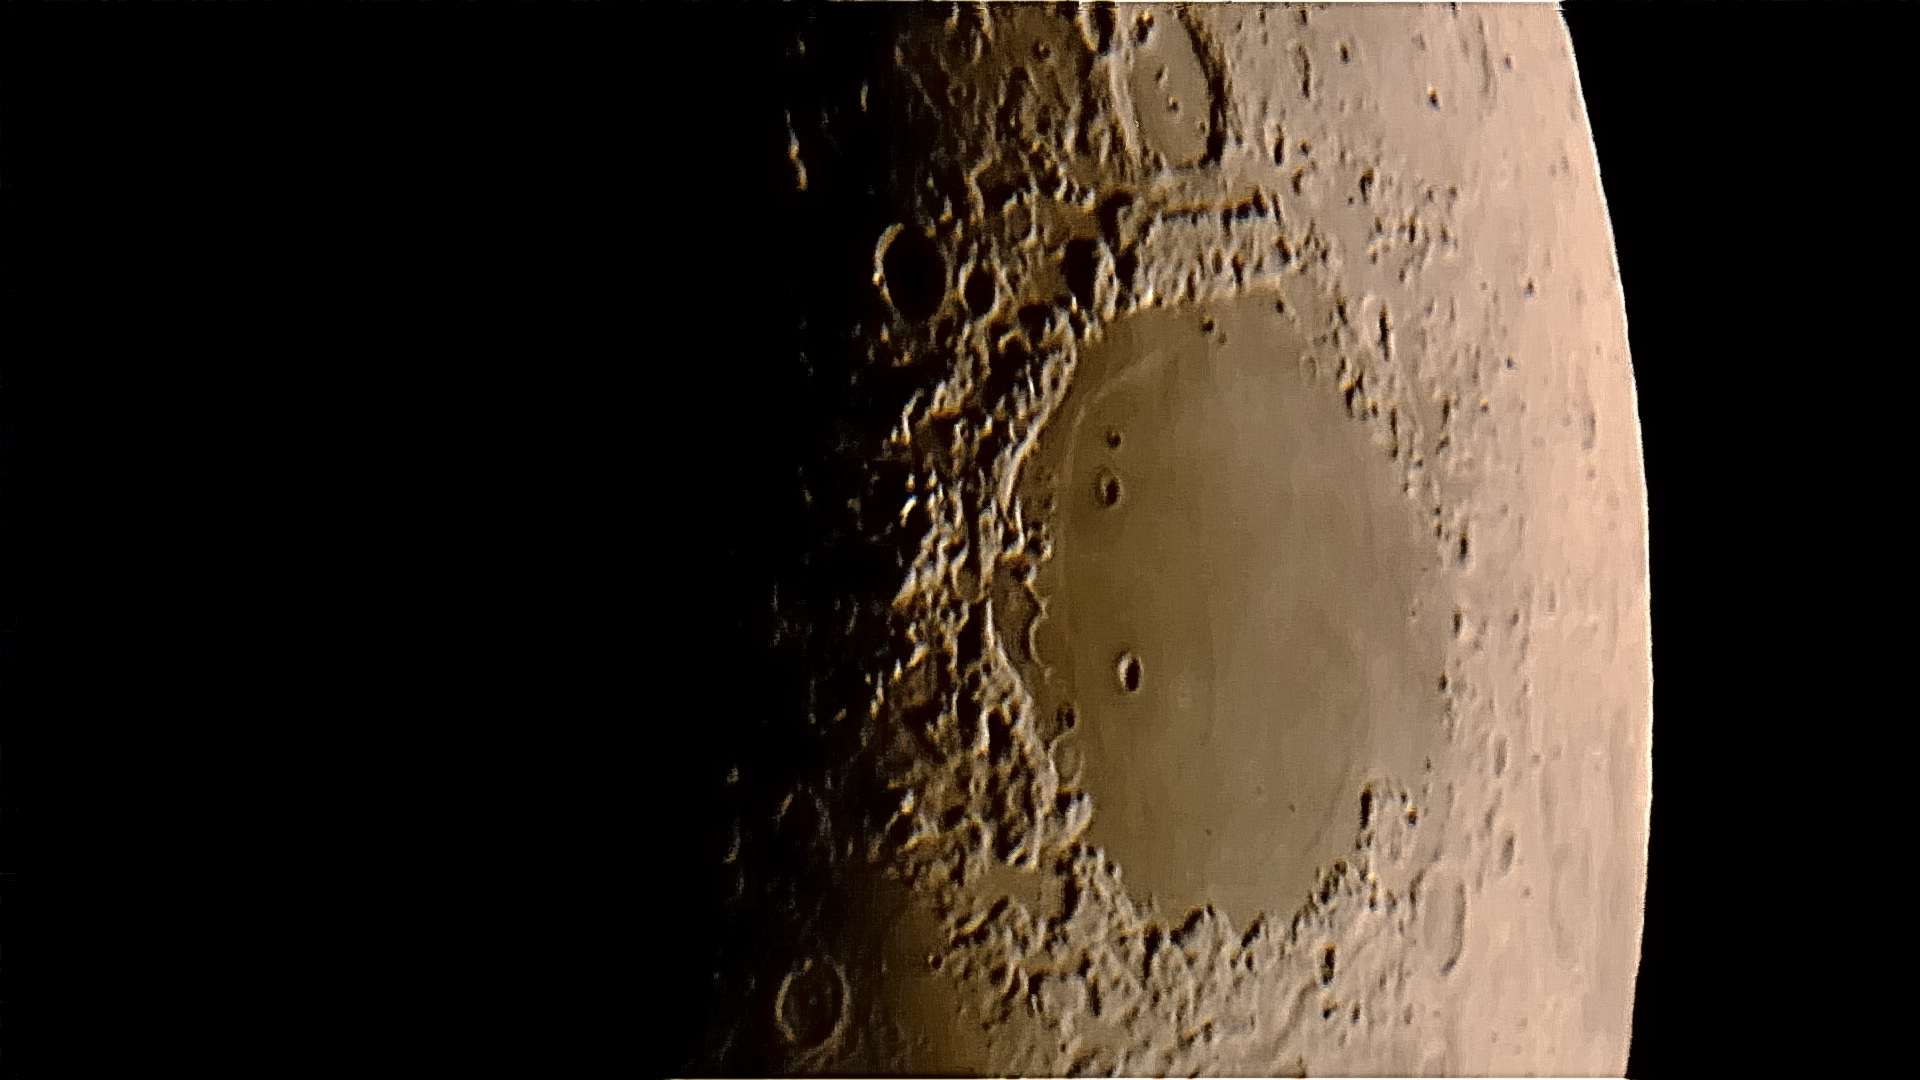
Mare Carisium
August 6, 2016
July 9, 2016
I had a better night tonight. Around midnight the wind
died down and I took more shots of M 16 the Eagle Nebula. I was able
to get good tracking and took 31 light frames at ISO 400 for a duration
of 1 minute. I reposted the image in the gallery and replaced the image
here in the Blog below July 8, 2016. It is a much better image with
more detail.
July 8, 2016
Last night was a good clear night, but the wind was blowing.
I moved from planetary photos back to Deep Sky Objects. My target was
M 16 the Eagle Nebula. Because the wind was coming from the south, my
scope was directly in its path. Even though I am in a dome, the wind
was coming directly into the dome shutter. Using my HyperStar, I was
able to get the exposure time down to 15 seconds at ISO 800. I even
had my Autoguider on but still was only able to capture about 8 good
quality light frames out of about 50 taken. I stacked the frames and
the result is shown below. I have taken a picture of this nebula before,
but this is the first time I have posted it. A larger view is in the
Gallery. (See the July 9 post above)
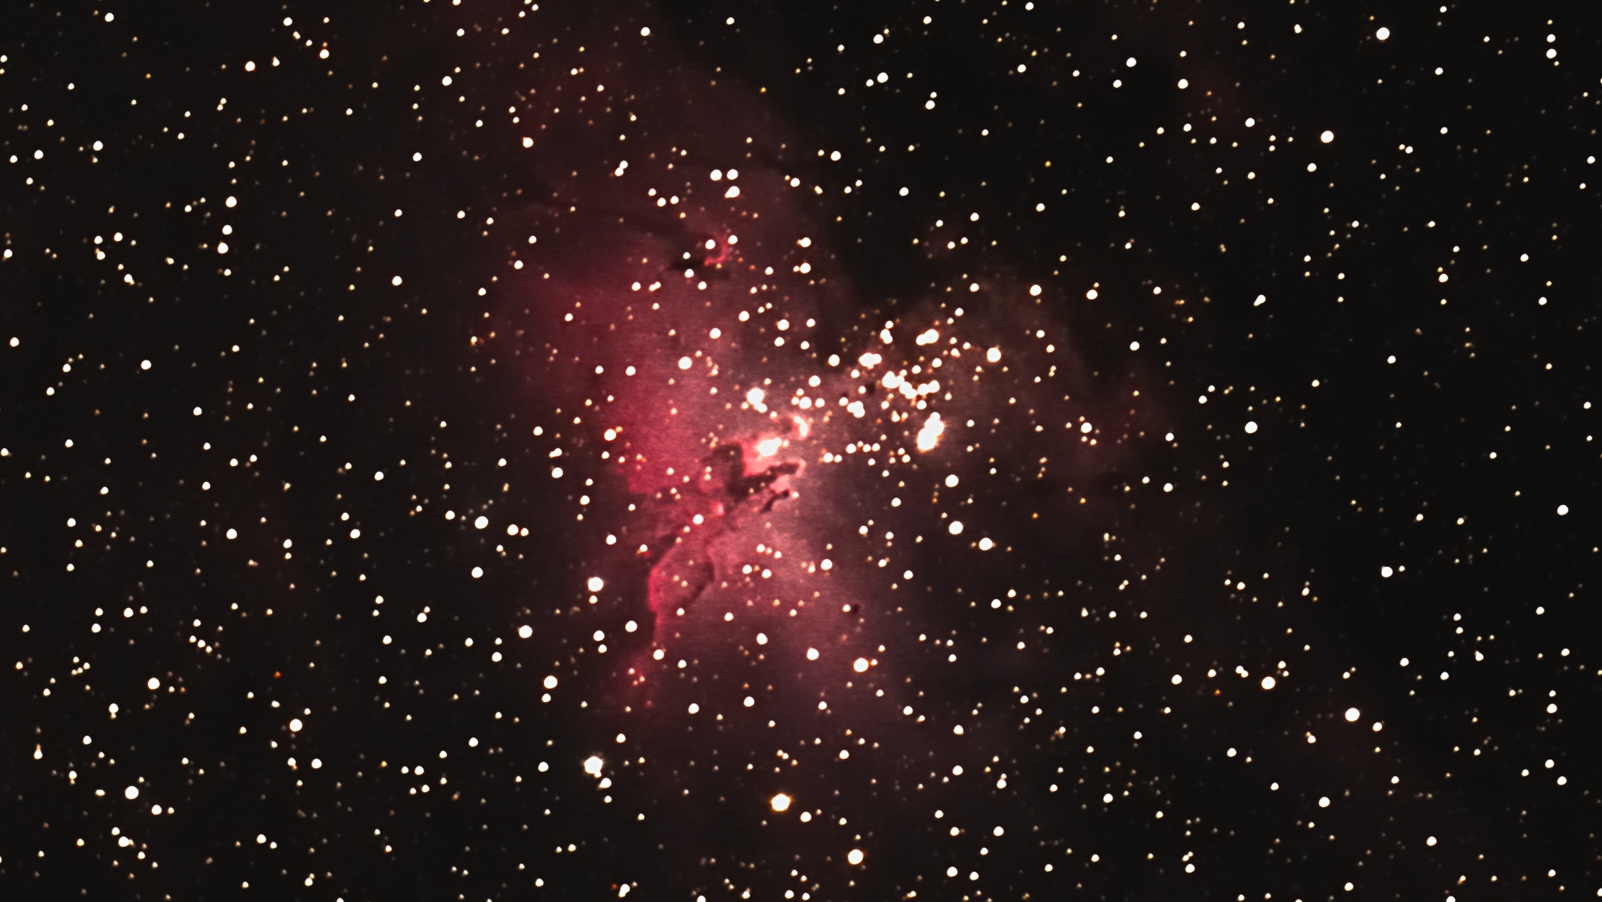
M 16 Eagle Nebula
July 9, 2016, 31 light frames stacked.
June 23, 2016
I have been obsessed lately with Planetary Photography.
So, I loaded my Jupiter AVI into RegiStax 6. For once I had a clear
calm night and was able to get good focus and to load a "Fair"
quality movie. On another try, I was able to get the "Great Red
Spot" but the seeing conditions were lousy. This time however,
no Red Spot, but I managed to get Europa in the picture. The results
are shown below.
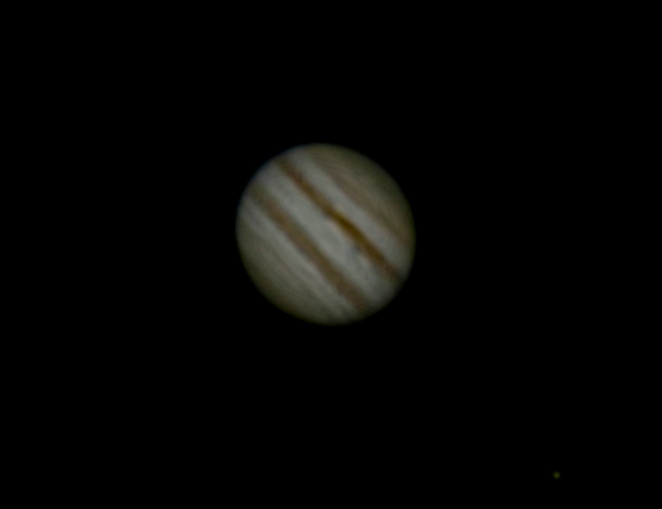
Jupiter and Europa
Europa is in the bottom right corner of the photograph.
I have posted a larger version in my gallery.
June 5, 2016
I would like to make a shout out to those living in Massachusetts,
New Hampshire, Maine, and the great country of Canada. Over the last
three weeks, I have been on a vacation to this area. We started in Boston
and went as far north as Prince Edward Island. I must say that those
of you who live in these areas, you were really friendly, and the scenery
was gorgeous. I can’t leave out the food, it was delicious. I
gained 3 pounds on that trip. Even though the weather was cool, it was
mostly cloudy therefore I couldn't see any stars or planets. When I
got home, I took this picture of Saturn. Still not very crisp, but I
am getting better. I posted it here so that I can see if I am making
any progress with Planetary Photography.

Saturn Taken on May 31, 2016
I used a 4X Tele Vue Power Mate and my Nikon D5200 in
video mode. I took a 60 second video at 1280 X 720 and 60 frames per
second. I used Registax 6 for stacking. Even though I have a large Aperture
Scope at 14 inches, I may have too much magnification to get a sharp
focused picture. I am going to try again with a 2X Barlow and see if
I can get it much more crisp. If any of you have suggestions on planetary
imaging, and would like to give me some tips, drop me an email. My contact
information is listed under the "contact us" tab.
April 3, 2016
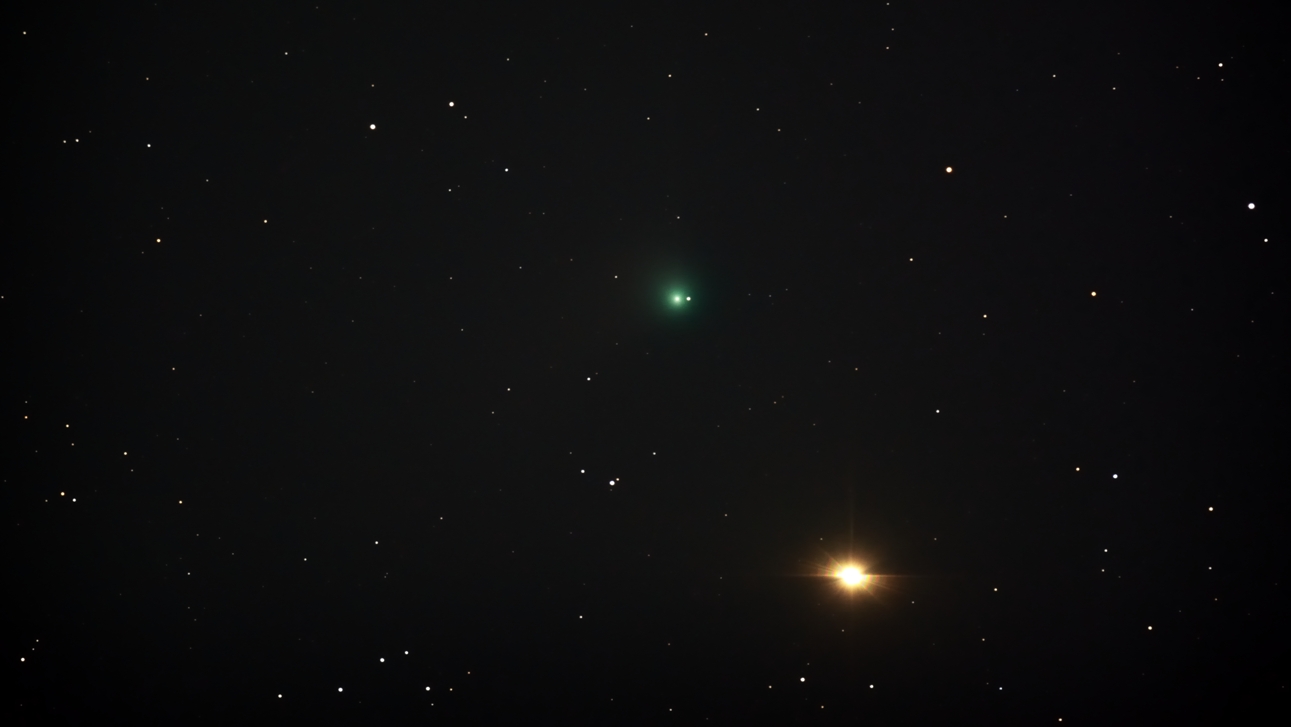
Finally a great night for picture taking. The moon was
rising early in the morning and I had set my sights on taking a picture
of Comet 252P/LINEAR. The challenge was getting the shot before moon
rise over the eastern mountain. I finally got the shot shown below at
around 5:00 am on April 2. No traditional tail on this comet as it just
shows up as a green ball. A larger picture can be seen in the gallery
along with details on what camera and equipment were used.
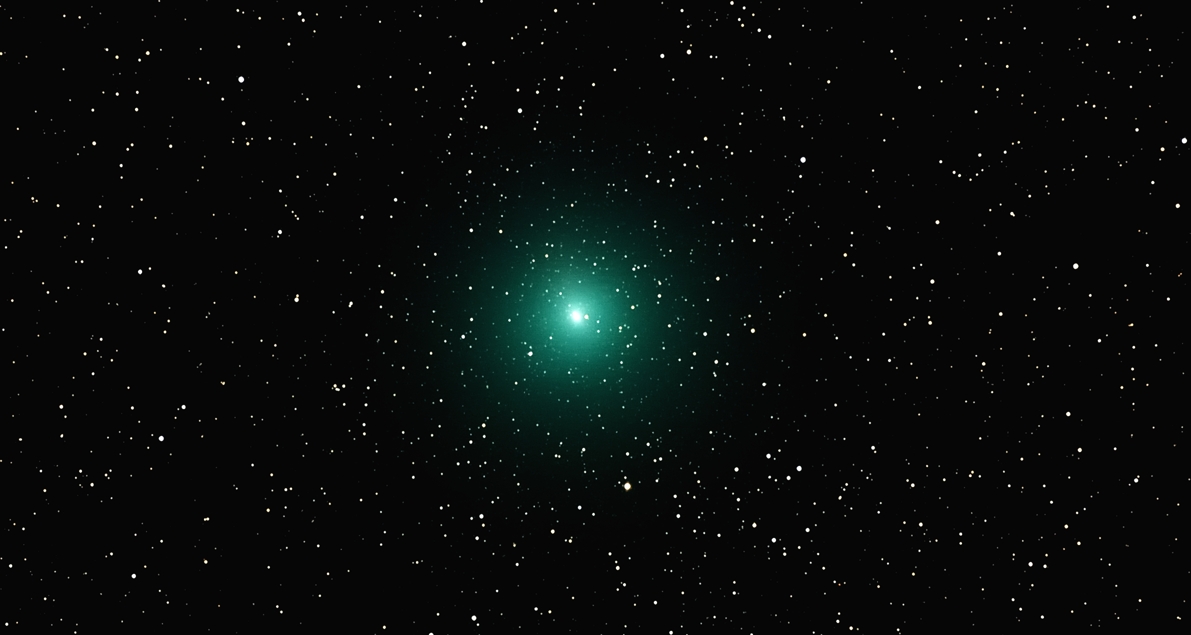
Comet 252P/LINEAR
February 27,2016
I promised a review of my new StarShoot Autoguider Pro
in comparison with my older version StarShoot Autoguider. Last night,
the skies cleared enough for me to get a lock on the Andromeda Galaxy
I pointed the scope to Andromeda and opened my original Starshoot Autoguider
in PHD Version 1.14. I set the camera Gain to 100 and looped the exposures
in 3 second intervals. This is not a technical review giving the pixel
resolution or the "Quantum Efficiency" of each camera, only
a visual picture of what each camera sees given all other parameters
are equal. Both cameras were attached to a Celestron 80 mm refractor
guide scope.
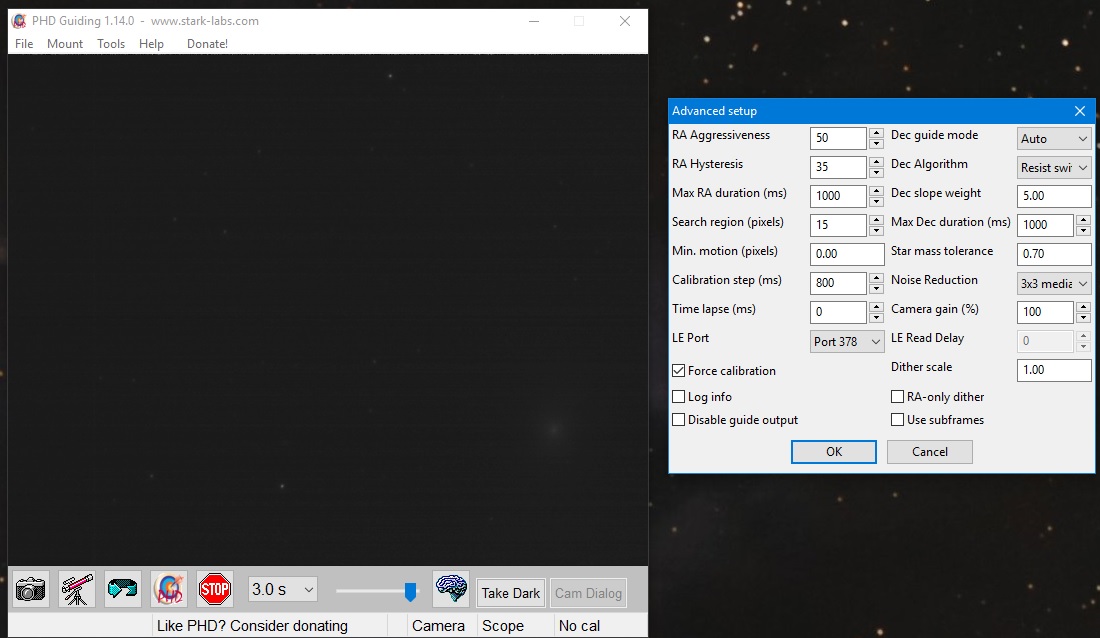
StarShoot Autoguider images.
Above is the Autoguider image with "Brain Settings" shown
on the right.
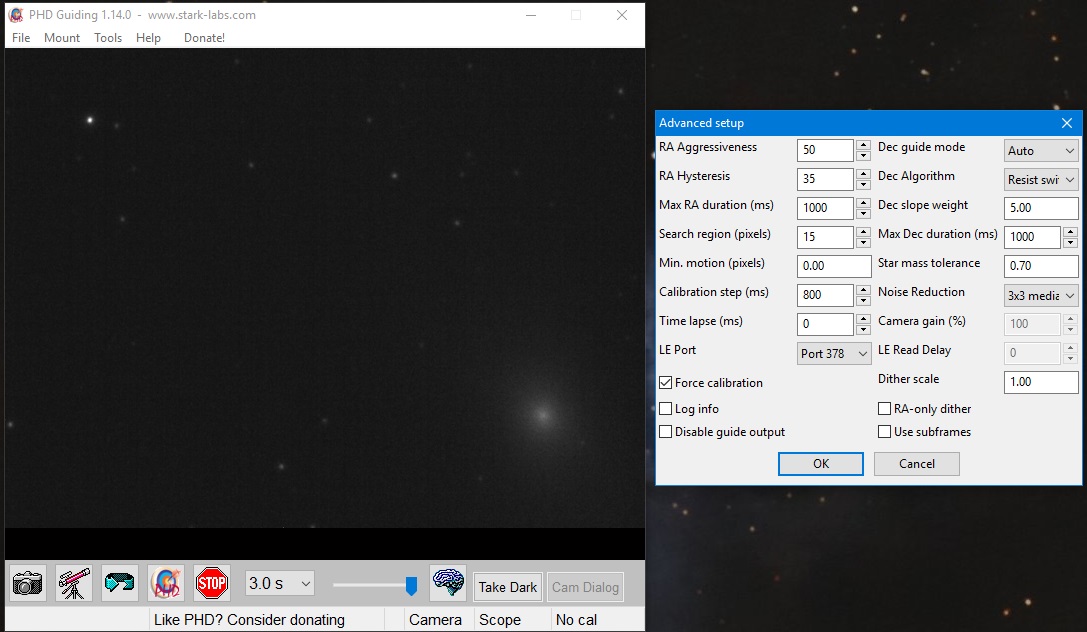
StarShoot Autoguider Pro Images
Above is the Autoguider Pro image with "Brain Settings" shown
on the right.
As you can see from both Images above, the Autoguider
Pro renders more stars and a more detailed image of Andromeda. For my
purposes, I will only use the Autoguider Pro for finding a suitable
guide star and then guiding my mount. I feel that changing to the Autoguider
Pro was worth the extra dollars spent as more stars are rendered as
suitable guide stars. The best test would have been on the Whirlpool
Galaxy M 51 as suitable guide stars are hard to find with my setup on
M 51. But this galaxy was too low on the horizon to be used for this
comparison.
February 12, 2016
Due to suggestions from those who visit my web page, I
have made some major adjustments to the "Astronomical Viewing Blog"
which you are now viewing. I have made an Archive folder indexed by
year so you can see my older posts. This page will now be dedicated
to the current year we are now in. To go to the "Astronomical Viewing
Blog Archive" page, simply click on the link "Astronomical
Viewing Blog Archive" above then select the year you want to view.
I made these modifications to the web page, because my skies have been
horrible during the past "Month" and viewing or imaging has
been impossible.
February 7, 2016
It was pointed out that my tutorial on "All-Star
Polar Alignment Procedure" had some errors in
it. I have corrected the errors and reposted it under the "Setup
Tutorials" tab. The error had to do with saying to use the "Up
and Down" arrows when making the final approach centering on a
star. The correct wording should be "Up and Right" arrows.
January 30, 2016
I have been having problems lately with my StarShoot Autoguider
Camera. It was an older version, and has served me well. The problem
with the camera started manifesting itself last summer when I was tracking
a Deep Sky Object. I would intermittently get an alarm from my PHD software
saying that it had lost lock. I would look at the computer and could
see that half of the image was dark and showing no stars. Then as the
camera would take other images the picture would return to normal and
the lock would be regained. Because of this problem, I purchased and
received today the StarShoot Autoguider Pro. This camera is much smaller
and much more sensitive. I am planning on putting a comparison of the
two on this page when I get some clear skies and can focus on the same
object. I have placed a picture of the camera under the equipment tab.
January 2, 2016
Happy New Year! I hope you all have “Clear Dark
Skies” when the observing desire strikes. On New Year’s
Day, at 3:30 AM I set an alarm so I could take a picture of “C/2013
US10 (Catalina)”. That would be Comet Catalina. The comet is about
a 4.4 magnitude and is presently near the star Arcturus. I took the
photograph, but I couldn't get an image of the tail due to the sky being
washed out by the moon. Every time I tried to take longer exposures,
the photograph was washed out. I need a dark clear night and I will
try again. I have posted the picture I took below but have not posted
it in my image gallery. I am waiting for better conditions. The bright
star in the photograph is Arcturus.
Comet Catalina
|